
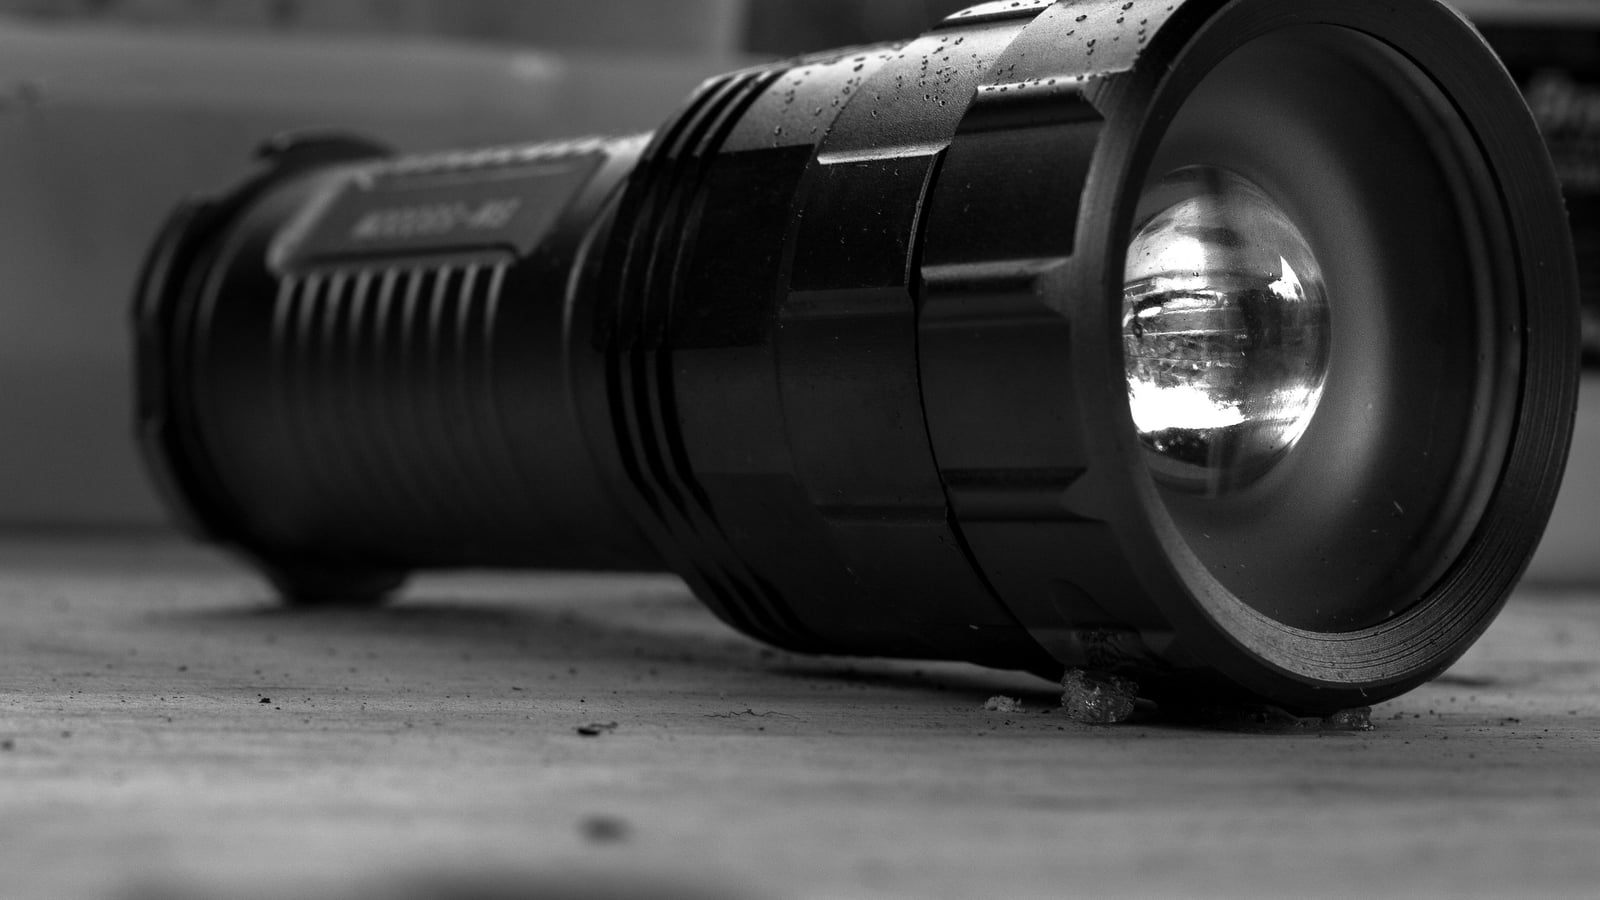
The word “tactical” does more harm than good
The term “tactical light” drags along an imagery that has nothing to do with civilian sport practice. In the public’s mind, it immediately evokes defense or confrontation, whereas in a shooting club, this accessory has strictly nothing to do with that. It’s a lighting tool mounted on a weapon, full stop.
In sport shooting, this light serves one precise purpose: seeing your target and checking your shooting environment in low-light conditions, during a supervised session or an event that plans for this kind of scenario. Nothing more, nothing less. The word “tactical” stays in manufacturers’ commercial vocabulary because it sells, not because it faithfully describes civilian sport use.
This semantic confusion has a real cost for practitioners. A shooter who shows up at a club with a mounted light sometimes gets remarks or sideways looks from people outside the sport, simply because of the word’s connotation. Yet the object itself is comparable to a hiker’s headlamp or a night mountain-biking floodlight: a light source, nothing that relates to combat use.
This guide aims to set the record straight: what a weapon-mounted light is really for in dynamic shooting and supervised night shooting, how to choose a model suited to your practice, and why confusing it with the general public’s defense use is a disservice to sport shooters and to the discipline’s image alike. We stay strictly within the framework of civilian sport shooting, leisure and competition, from start to finish.
Real use in dynamic shooting: IPSC, Steel Challenge, 3-gun
In dynamic disciplines, the mounted light comes into play mainly during specific range scenarios that include a passage through a dark or dimly lit zone. Some indoor shooting courses deliberately include a section in a hallway or dimmed area, where the shooter must identify their cardboard or steel targets before starting their shooting sequence.
In this specific context, the light isn’t a gadget: it’s literally part of the stage. A shooter who neglects their lighting on this type of course loses precious time visually searching for a target they would have identified in a fraction of a second with a properly aimed light source. Timer management, central to these disciplines, therefore indirectly includes light management.
Two uses that beginners often confuse should be clearly distinguished:
- Movement lighting: the light stays on continuously or with short presses while the shooter moves between shooting positions, to spot terrain and obstacles.
- Engagement lighting: the light comes on at the exact moment of aiming at a target in a dark zone, generally with a brief, controlled press so as not to hinder the next shooter or needlessly blind anyone.
Most dynamic discipline rulebooks strictly regulate light use during an event: zones where activation is allowed, mandatory orientation so as not to disturb other competitors or the public, and sometimes an outright ban outside the scenarios planned for it. An experienced instructor systematically recalls these rules before any event that includes a low-light section, because a violation can lead to a penalty or disqualification of the stage.
A point often underestimated by newcomers: the light changes the grip and balance of the weapon, even a lightweight model. Training to draw, aim, and engage a target with the light mounted requires specific repetition, distinct from standard training without the accessory. A regional champion in a dynamic discipline often stresses this point to shooters discovering the accessory: the light must be integrated into technical training, not added at the last minute on event day.
Supervised night shooting and difference from general public use
Outside occasional dynamic scenarios, some clubs organize supervised night shooting sessions, generally at an outdoor range approved for this kind of time slot. The educational goal is clear: learn to manage a reduced-visibility environment within a strictly secured framework, with reinforced supervision and safety instructions adapted to darkness.
In this context, the mounted light is just one of the equipment elements, on the same footing as firing-line lighting, reflective marking, or a headlamp worn by the instructor to supervise the session. It serves to visually confirm the target and its immediate environment before engagement, never to replace the usual safety rules on muzzle direction or firing line management.
This type of session remains rare and strictly supervised, generally reserved for shooters already confirmed on daylight safety fundamentals. A club that offers this time slot almost always requires a specific briefing before first participation, with a reminder of darkness-specific instructions: heightened muzzle direction management, reinforced checking of the area behind the target, and more sustained vocal coordination between shooters than in a classic daytime session.
The mounted light plays a supporting role there, not a central one. The real educational subject of this kind of session is managing stress and perception in degraded conditions, not the accessory’s performance itself. A shooter who has never practiced this kind of time slot often discovers that their perception of distances and contrasts changes entirely in the dark, far more than their light’s artificial illumination alone can compensate for.
The general public associates the mounted light with confrontation or close-range defense use, with intervention scenarios in a built environment. This use has nothing to do with civilian sport shooting and is not developed at all in this guide, which remains strictly focused on leisure and competition sport practice.
What concretely changes between the two mindsets are the selection criteria themselves. Sport use favors a reliable light, reproducible from one shot to the next, with a beam that clearly identifies a cardboard target or a steel plate at the shooting distance planned by the scenario. The use fantasized by the general public highlights discretion or third-party dazzling criteria, which have no relevance whatsoever on a supervised sport firing line.
Another important difference: on a sport shooting range, the orientation and use of the light are dictated by the discipline’s rulebook and the club’s safety instructions, never by confrontation logic. The light turns on when the scenario calls for it, stays off the rest of the time, and its beam stays strictly aimed at the authorized target area.
This clarification isn’t just a matter of vocabulary. It also shapes how a club or federation can present this accessory without feeding unnecessary confusion with a use foreign to the sport. Presenting the mounted light as a simple sport lighting tool, comparable to a range floodlight or a hiking headlamp, helps defuse the misunderstandings that sometimes surround this equipment among people outside the practice.
Lumens: what the number really tells you
The lumen measures the total amount of light emitted by a source, but this number alone doesn’t tell the whole story about a light’s real effectiveness in sport use. Two lights showing the same lumen count can give very different results on target depending on the beam shape and the quality of the optic shaping it.
For indoor dynamic use at short distances, a wide, even beam lets you quickly spot a target without needing to precisely sweep with a narrow light point. For longer-distance use, a more focused beam carries further but lights a more restricted zone, which demands more precise aiming to correctly identify a cardboard target or a steel plate.
A few general guidelines, to adapt to the actual scenario:
- A wide, diffuse beam favors peripheral vision and movement in dark zones, useful for movement lighting between shooting positions.
- A focused beam favors precise identification of a distant target, better suited to engagement lighting at the moment of aiming.
- Some models offer a mixed beam, with a peripheral halo and a more intense central point, attempting to reconcile both needs.
The exact lumen count that suits you depends heavily on the scenario, the planned shooting distance, and the range’s ambient light conditions, all parameters that vary from club to club. Rather than aiming for a precise number found on a spec sheet, it’s better to physically try a light under the real conditions of your usual range before settling on your choice, or ask an instructor who knows the venue’s lighting setup well.
Beyond lumen count, the beam’s color temperature also influences the ability to distinguish the details of a cardboard target or the relief of a steel plate in dim light. Light that’s too cold, very white or even slightly blue-tinted, can flatten contrasts on certain surfaces and make quickly reading a zone to engage harder. Warmer light, close to neutral white, generally renders color and relief nuances better, which helps spot the edges of a cardboard target or a painted scoring zone faster.
Some recent models offer several color temperature settings or several selectable intensities on the same device, allowing the light to be adapted to different scenarios without changing equipment. This versatility comes at a cost: multiplying settings adds complexity at the switch and can slow down activation if the shooter has to hunt for the right mode mid-timed sequence. An experienced club shooter who regularly practices dynamic shooting often favors simplicity: a single fixed mode, set once and for all, rather than a multi-mode light that requires thought at the moment of pressing the button.
Mounting on the weapon: rails, position, alignment
Mounting directly determines the light’s usability in a shooting situation. Most lights meant for sport shooting install on a Picatinny rail or a compatible proprietary rail, positioned under the barrel or to the side depending on the weapon’s configuration and its already-mounted accessories.
Several points deserve attention when mounting:
- Position relative to the support hand: the light must never hinder natural grip nor require contortion to reach the activation button.
- Beam alignment relative to the sight line: a misaligned beam lights a different zone than the one aimed at, which quickly becomes a handicap in a dynamic situation where every fraction of a second counts.
- Solidity of the fixture: a poorly tightened clamp or rail mount can let the light drift over the course of shots due to repeated vibration, throwing off the alignment set at the start of the session.
- Overall bulk: an overly bulky light can interfere with a bipod, a sling, or another accessory already present on the rail, especially on a weapon already loaded with accessories.
The activation button deserves particular attention depending on the discipline practiced. Some dynamic shooters prefer a switch directly accessible with a finger of the support hand, without having to release their main grip, which calls for choosing a model with a well-positioned switch or adding a compatible remote switch.
A point of caution that comes up often among instructors who supervise beginners with this accessory: mounting a light changes the weapon’s center of gravity and thus its balance when aiming. A shooter used to their setup without a light should go through a few familiarization sessions before using this setup in a real timed-scenario situation, rather than discovering the balance change on event day.
Beyond the light itself, the remote switch is the most common complementary accessory: a small button connected by a thin wire to the light, positioned at a spot chosen by the shooter on the handguard, to activate lighting without having to move the hand from its usual grip point. This type of switch has real value in dynamic disciplines, where every grip change costs time on a timed course. Its main drawback remains the connecting wire itself, which can snag on clothing or a sling if the routing isn’t carefully secured along the handguard with suitable clips.
Some mounts also offer fine adjustment of the light’s angle, independent of the rail position, allowing precise adjustment of the beam’s orientation relative to the sight line without having to reposition the whole light body. This kind of fine adjustment deserves to be checked and locked at the start of the season, then periodically rechecked, as repeated shooting vibration can make it drift slightly over time. A removable filter or diffuser, offered by some manufacturers, finally allows the beam shape to be adjusted on the fly without changing lights, a flexibility especially relevant for a shooter who regularly alternates between several types of scenarios with the same light.
Battery life and management
A mounted light’s battery life depends directly on the usage mode chosen: continuous on, repeated brief presses, or a strobe mode sometimes offered by certain models but rarely relevant in sport use. Repeated brief-press use, typical of dynamic scenarios, preserves battery life noticeably more than prolonged continuous lighting.
Ambient temperature also affects real battery performance, particularly at an outdoor range in winter, where rechargeable batteries generally lose capacity compared to use in temperate conditions. A shooter who practices in all weather has an interest in testing their light’s real endurance in cold conditions before relying on it for an important event.
A few good practices that come up among regular practitioners:
- Always start a session with recently checked batteries or cells, never based on a rough memory of the last charge level.
- Keep a spare set of batteries or a spare battery pack in the shooting bag, especially for a competition spread over a full day.
- Check the power type before purchase: some models use standard batteries easy to find anywhere, others use proprietary rechargeable batteries that require planning ahead for charging.
- Avoid leaving a light on prolonged standby with a nearly dead battery, which can accelerate wear on certain types of rechargeable batteries over time.
Excessive trust in the battery life advertised by the manufacturer remains a classic mistake. The stated battery life figures often correspond to optimal test conditions, rarely identical to real use interspersed with short presses and temperature variations at a range. It’s better to stay cautious and plan a safety margin rather than strictly relying on the manufacturer’s data.
Durability and reliability in shooting conditions
A weapon-mounted light takes on much greater mechanical stress than a classic flashlight: repeated recoil at every shot, vibration, occasional impacts during fast dynamic handling. The ruggedness of the housing and the mount thus becomes as important a selection criterion as light output itself.
Manufacturers generally indicate a water and dust resistance rating, as well as impact resistance expressed as a tested drop height. These indications give a useful order of magnitude, without however guaranteeing identical durability against the repeated and prolonged recoil of intensive sport use, which stresses the device differently than a single isolated drop.
A shooter who regularly practices dynamic shooting with a strongly recoiling weapon has an interest in checking, if possible by asking directly other practitioners at their club or a specialized gunsmith, a model’s reputation for durability over time before buying rather than relying solely on the spec sheet. Forums and practitioner communities remain a useful source for this kind of concrete feedback, provided you cross-reference several opinions rather than relying on a single isolated testimonial.
The front lens also deserves regular checking: powder residue, range dust, or a scratch accumulated over time can progressively degrade the beam’s quality and evenness, without this being immediately visible to the naked eye in broad daylight. Simple periodic cleaning, with a soft cloth suited to optical surfaces, extends the device’s real performance over time.
Compatibility with the weapon and other accessories
Choosing a mounted light is never done in isolation: it directly depends on the weapon’s overall configuration and the accessories already present or planned. A rail already loaded with an optical sighting system, a bipod, or a foregrip sometimes leaves little room for a bulky light, which pushes some shooters toward more compact models, even at the cost of some light output.
The space available on the rail also influences the choice of mounting position. A light positioned too far forward can unbalance a weapon already front-heavy due to a long barrel or another bulky accessory. A position too far back can, conversely, hinder the support hand or conflict with a folded bipod.
A few practical questions to ask before buying:
- Does the weapon have a rail long enough to accommodate the light without repositioning an already-installed accessory.
- Do the barrel’s diameter and shape allow stable mounting without interference with a muzzle brake or compensator already in place.
- Does the discipline practiced impose total weight or dimension constraints on the weapon that would limit the choice of an overly bulky model.
- Does the planned budget include, besides the light itself, any mount or clamp compatible with the existing rail, often sold separately.
A gunsmith used to dynamic shooting remains the best resource to concretely confirm compatibility between a specific light and a given weapon configuration, especially on configurations already loaded with accessories. Physically trying the mount before the final purchase, when possible, avoids many disappointments linked to bulk poorly anticipated on paper.
Beam quality ultimately depends on the quality of the reflector or lens shaping the light emitted by the diode. A poorly designed reflector can create rings or irregular shadow zones in the beam, which complicates visually reading a partially lit target. Physically comparing several models on a wall or neutral surface before purchase, when possible at a gunsmith’s, gives a much better idea of real rendering than a simple spec sheet.
Specific training: integrating the light into your routine
Adding a mounted light to your usual setup changes several parameters at once: the weapon’s total weight, its balance, and the motion needed to activate lighting at the right moment. A shooter who only works on this new setup under competition conditions, without prior training repetition, risks having their usual reflexes disrupted at the worst possible moment.
The approach recommended by most instructors consists of introducing the light progressively, initially outside any timed pressure. A few dry sessions, without ammunition, allow working solely on the activation motion and the modified grip, before moving to a real exercise on a cardboard target or steel plate.
A simple, often recommended exercise consists of repeating the full sequence several dozen times: shoulder the weapon, activate the light with a natural motion, identify the target, engage, release the switch. The regularity of this repetition matters more than the volume of ammunition fired, because the goal is to automate a motion, not to work on pure precision.
- Start with dry repetitions, without ammunition, to anchor the activation motion.
- Then introduce real shots at a short, known distance, in a zone properly lit by the club to stay safe during the learning phase.
- Gradually increase the scenario’s difficulty once the motion is automated, getting closer to real competition conditions.
- Vary shooting positions (standing, kneeling, slow movement) to verify that activation stays smooth in different postures.
A point often neglected by shooters in a hurry: also work on releasing the light, not just activating it. A switch stuck in the on position after an engagement can needlessly blind a teammate or hinder the rest of the course, especially in a scenario that strings together several zones of different brightness. A regional champion in a dynamic discipline often reminds her students that fully mastering the on-off cycle is as much a part of technique as the shooting itself.
Routine maintenance and storage between sessions
A mounted light remains an electronic device exposed to sometimes harsh conditions: range dust, temperature variations, repeated contact with the shooter’s sometimes greasy or damp hands. Regular maintenance, simple but methodical, significantly extends the device’s lifespan and the reliability of its beam.
A few simple habits to build into your equipment maintenance routine, on the same footing as cleaning the weapon itself:
- Wipe down the housing after each session, especially the joints and around the lens where dust and residue can accumulate.
- Check the condition of the seals on models equipped with them, a cracked or deformed seal can let in moisture.
- Remove the batteries or disconnect the battery pack in case of prolonged storage without use, to avoid deep discharge or an electrolyte leak that could damage the housing.
- Periodically check the tightness of the rail mounting system, repeated shooting vibration can loosen a clamp over time.
- Store the device in a dry, temperate place between sessions, avoiding extreme temperature swings that can weaken electronic components over time.
A quick check at the start of each session, even before mounting the light on the weapon, lets you catch an anomaly before it becomes a problem mid-scenario: normal power-on, visual check of the lens, quick switch test. This simple habit avoids the bad surprise of a faulty device discovered only when engaging it on a timed course.
For a shooter who owns several weapons each equipped with their own light, keeping a brief history of each device’s state (date of last battery change, last mount-tightness check) avoids forgetting maintenance on equipment used less frequently than others. This tracking can very well be noted in the same logbook or app used to record shooting sessions themselves, which centralizes the information rather than scattering it across several media.
Common mistakes among shooters discovering the accessory
Certain mistakes recur regularly among practitioners mounting a light for the first time, whether for a dynamic discipline or a supervised night shooting session.
- Choosing a light solely on the advertised lumen count, without considering beam shape or the actual intended use.
- Mounting the light the night before an event without having had time to check beam alignment or train with the new grip.
- Neglecting real battery life under competition conditions, relying solely on the manufacturer’s figure without a safety margin.
- Forgetting to check the rules specific to your discipline regarding light use during an event, which can lead to an avoidable penalty.
- Positioning the activation switch somewhere that forces a complete change to your usual grip, which slows down engagement in a timed situation.
- Neglecting maintenance of the front lens, letting powder residue accumulate that progressively degrades beam quality.
An experienced instructor who supervises beginners with this accessory generally stresses one simple point: the mounted light must be integrated into regular training, not added at the last minute. Repeated handling over several sessions allows automating the activation motion and prevents it from becoming a source of hesitation on the day of a timed event.
Buying new or used: points to watch
The used market also covers mounted lights, particularly among shooters who regularly change their setup or resell an accessory that’s become incompatible with a new weapon. A few simple checks help avoid bad surprises with this type of purchase.
- Check the condition of the front lens with the naked eye, looking for deep scratches or impact marks that could degrade beam quality.
- Test the device under real conditions before buying if possible, especially the switch, whose mechanical wear after thousands of activation cycles can become less crisp or less responsive.
- Ask the previous owner about the usage history: a light used intensively in dynamic competition has taken on far more vibration and impacts than a model that stayed mounted on an occasional leisure-shooting weapon.
- Check the compatibility of the supplied mounting system with your own weapon’s rail, some mounts are specific to a brand or a precise rail diameter.
- Make sure the type of battery or cell used remains available on the market, some older models use proprietary battery formats that become hard to find after several years.
A used light in good condition often remains a reasonable option for a shooter starting out who wants to try the accessory before investing in a costlier new model. The main risk concerns the real state of the battery or cell, whose degradation isn’t always visible before a full battery-life test under real usage conditions.
Budget and priorities based on your practice
The budget to devote to a mounted light depends mainly on the frequency and level of demand of your practice, more than on a universal figure to follow. Prices vary a lot depending on brand, power, ruggedness, and any connectivity, and evolve too fast for a precise amount to remain relevant in a guide meant to stay valid over time.
For occasional use, an occasional participation in a scenario including a dark zone, a reliable entry-level model is largely enough, provided you check its compatibility with your weapon and its mounting. For regular practice in dynamic competition, investing in a model recognized for its ruggedness and beam reproducibility becomes more relevant, because reliability under repeated conditions takes precedence over the simple purchase-price criterion.
A few priorities to rank based on your practitioner profile:
- Occasional practitioner: basic reliability and mounting compatibility above all, no need for the highest light output on the market.
- Regular dynamic competitor: ruggedness against repeated recoil, beam reproducibility, and activation speed become priorities.
- Participant in supervised night shooting sessions: sustained battery life over time and resistance to cold or damp outdoor conditions matter more than raw power.
- Shooter with a weapon already loaded with accessories: compactness and weight of the light take priority so as not to unbalance an already dense setup.
Asking directly at your club or a gunsmith specialized in dynamic shooting remains the best way to tailor this choice to your real practice, rather than relying solely on online reviews or a manufacturer’s sales pitch, which rarely stays neutral on the question of price or advertised power.
FAQ
Q: Does a light mounted on a sport weapon change its legal classification? A: No, a light is a lighting accessory, it doesn’t change the legal category of the weapon it’s mounted on. If any doubt exists about your specific setup, your gunsmith remains the most reliable person to check with.
Q: Do you need a light to start dynamic shooting? A: No, it’s not essential to get started, most scenarios don’t require it. It becomes useful mainly once you start encountering courses that include a dark-zone section.
Q: What’s the difference between a weapon-mounted light and a classic flashlight? A: The mounted light is designed to withstand repeated shooting recoil and to fix solidly onto a rail, with a switch designed for quick use in a situation. A classic flashlight generally isn’t designed for these specific mechanical stresses.
Q: Is the highest lumen count always the best choice? A: Not necessarily, beam shape and actual intended use often matter more than the raw number. A beam poorly suited to your usual shooting distance can be less effective than a less powerful but better-calibrated model.
Q: Can this light be used freely during any competition event? A: No, each discipline has its own rules on when and under what conditions use is allowed during an event. Always check your discipline’s specific rulebook and your club’s instructions before a competition.
Q: How do I know if my light is compatible with my weapon? A: It depends on the type of rail present on your weapon and the space available given the other accessories already mounted. A gunsmith used to dynamic shooting can concretely confirm this compatibility before purchase.