
Why the question “which sight” has no universal answer
You’ll come across dozens of contradictory opinions on forums and at the range. One person swears the red dot is the only serious option, another swears by iron sights, a third raves about their high-magnification scope. They’re all right, but each only within their own context.
Choosing a sight depends almost exclusively on three factors: the discipline you practice, the shooting distance set by the rules, and the speed at which you need to engage the target. A sighting system that excels at Olympic precision on a fixed target at 10 meters is useless in dynamic shooting, and vice versa.
This article compares the three sight families across real-world civilian shooting sports uses: regulated precision, dynamic shooting on cardboard or steel targets, and long range. The goal isn’t to crown a winner, but to help you choose based on what you actually shoot, with realistic price ranges for each category.
Before you invest, keep in mind that a sight never replaces technique. A top-of-the-line rear sight in a beginner’s hands will give worse results than a basic front sight handled by a shooter who has mastered their stance and breathing. Gear amplifies a skill level, it doesn’t create one.
The three families of sighting systems
Before comparing by discipline, you need to understand what each system actually offers in terms of visual perception and acquisition speed.
Rear and front sights form a so-called “iron” or “open” sighting system, made of two elements aligned at different distances from the eye. The shooter must bring three planes into coincidence: the rear sight close to the eye, the front sight ahead, and the target in the distance. This triple alignment demands precision and a moment of visual accommodation, but it offers very fine control of the aim point and remains the mandated standard in several regulated disciplines.
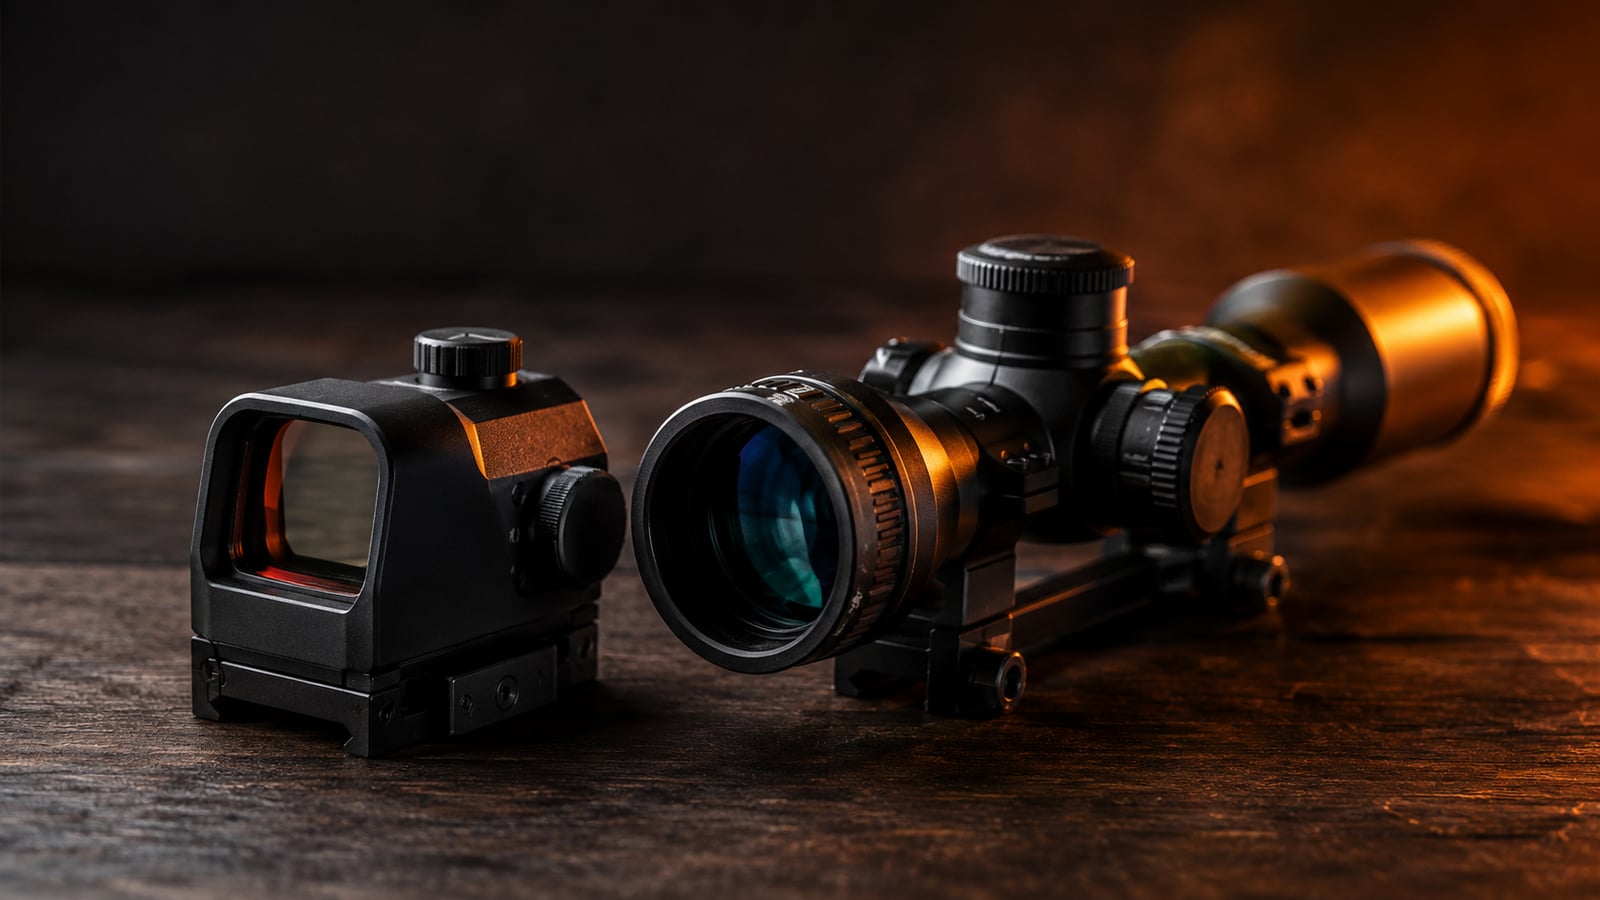
The red dot is an electronic or diode sight that projects a lit dot onto a lens, with no magnification in the vast majority of models used in competitive shooting. The eye only has one plane to manage: the dot superimposed on the target, seen through a transparent lens. This reduces target acquisition time and makes shooting with both eyes open easier, a real advantage in dynamic shooting.
The riflescope adds optical magnification, variable or fixed depending on the model, with a reticle that often lets you compensate for trajectory or wind at long range. It requires a stable position and a longer setup time, which reserves it for disciplines where the target is fixed and distant.
- Iron sights: maximum precision at short and medium range, but slow to set up and physically demanding on the eyes.
- Red dot: fast acquisition, dynamic shooting, but poorly suited to long-range precision shots without magnification.
- Scope: range and precision at long distance, but bulky and useless under 25 meters in most cases.
Olympic precision: regulated iron sights
Precision disciplines inspired by Olympic shooting (10-meter rifle, 50-meter rifle, 10-meter pistol, 25-meter pistol) almost systematically require metallic sights with no magnification or electronic device whatsoever. This is a fundamental rule, not a technical detail: these disciplines assess the shooter’s ability to align the sighting elements themselves, without optical assistance.
The front sight adjusts in height and sometimes width depending on the rifle, with interchangeable inserts (front sight tunnels) that let you adjust the diameter of the ring or the shape of the sight post depending on light conditions and the shooter’s preference. The rear sight, mounted on the rear sight base, generally has an adjustable iris that controls the aperture diameter: the more closed the iris, the greater the depth of field, but the less bright the target appears.
This iris adjustment is one of the most personal settings in precision shooting. A regional 10-meter rifle champion will adjust her iris differently from a beginner, depending on her eyesight and the lighting on the range. There’s no universal setting, only a starting point to be refined during training sessions.
For precision pistol, the rear and front sights are often mounted directly on the slide or rail of the gun rather than on a dedicated sight base, but the principle remains identical: alignment with the naked eye, without optical aid.
Budget-wise, good-quality metallic sighting elements for precision rifle or pistol generally range between 80 and 400 euros depending on the brand and finish level, knowing that the entry-level models supplied as standard with the gun are more than enough to start and progress for several seasons. The higher-end versions, with micrometric adjustments and multiple inserts, cost more, but the investment is only justified at an already confirmed competition level.
- Rear sight iris: adjustable diameter, to be tuned depending on the range’s lighting.
- Front sight tunnel: interchangeable inserts to adapt the shape and diameter of the sight post.
- No magnification or electronic device allowed in these regulated events.
Why the red dot dominates dynamic shooting
In competitive dynamic shooting (IPSC-type disciplines, Steel Challenge, or similar, practiced on cardboard and steel targets), acquisition speed takes precedence over extreme precision. The shooter must engage multiple targets in minimal time, often while moving or after repositioning, which makes the three-plane alignment of iron sights noticeably slower.
The red dot solves this problem by directly superimposing the lit dot on the target aimed at, without the eye needing to accommodate between several planes. The shooter keeps both eyes open, which widens peripheral vision and makes it easier to move from one target to another.
On handguns, the red dot is usually mounted on a slide cut or on a dedicated mount depending on the gun model. On rifles, it attaches to a Picatinny or similar rail. In both cases, co-witnessing with the factory iron sights remains recommended as a backup, in case the red dot’s battery dies mid-string.
An important point to know before buying: dot size (expressed in MOA, minute of angle) directly affects perceived speed and precision. A large dot (6 to 8 MOA) is acquired faster at short range but hides part of the target for more precise shooting. A finer dot (2 to 3 MOA) takes a bit more time to acquire but remains usable on smaller or farther targets.
Battery life and resistance to recoil shock are the two criteria that really separate price ranges. An entry-level red dot can shift its zero after several hundred rounds on a hard-recoiling gun, something a more robust model will avoid.
- Realistic price range for a reliable red dot in competitive dynamic shooting: roughly 150 to 600 euros for entry to mid-range, and it can climb significantly higher for high-end models used in regular competition.
- Check the red dot’s compatibility with your exact gun model (slide cut, screw spacing) before any purchase.
- A spare battery in your range bag is never a luxury.
Long range: magnification, reticle, and reading trajectory
For long-range shooting disciplines and uses (rifle on a fixed target beyond 100 meters, for example), the scope becomes the relevant tool because it lets you actually see the intended point of impact and compensate for bullet drop caused by gravity and wind.
Magnification is chosen based on your usual shooting distance. Fixed magnification or a low range is plenty up to 100-200 meters, while a higher variable magnification becomes useful beyond that, keeping in mind that high magnification narrows the field of view and amplifies mirage effects in hot weather.
The reticle is another defining choice. A simple reticle (fine crosshair) is enough for casual use on a fixed target at a known distance. A graduated reticle (mildot type or with holdover marks) lets you estimate distance or correct the aim point directly without touching the turrets, which is valuable when time between shots is limited.
Adjustment turrets (elevation and windage) must be adjusted methodically: a zeroing shot at a known reference distance, then progressive adjustments, noting each click in a shooting log. This is a matter of rigor, not intuition, and the slightest misunderstood click value (in MOA or mrad depending on the scope) can throw off all your subsequent adjustments.
Mounting the scope on the rail is a point that’s often underestimated. A poorly tightened or misaligned base and rings cancel out all the benefits of a quality scope, because the point of impact drifts as shots accumulate. A gunsmith or an experienced club shooter can help you check the optical alignment before your first outing.
- Realistic price range: decent entry-level scopes for casual use start around 150 to 300 euros, reliable mid-range for regular use sits more between 400 and 1000 euros, and high-end scopes used in long-range competition can far exceed that threshold.
- A scope’s price depends mainly on optical quality (clarity, brightness at the end of the day) and turret repeatability, not just the advertised magnification.
- A cheap but well-tuned scope often beats an expensive, poorly mounted one.
The often-overlooked factor: eye dominance and body shape
A point many beginners completely overlook: choosing a sight must also take your dominant eye and body shape into account, not just the discipline. A shooter whose dominant eye doesn’t match their dominant hand will need to adapt their mounting, head position, or even the type of sight chosen.
For iron sights, the distance between the eye and the rear sight (eye distance) affects comfort and perceived sharpness. This distance depends on the shooter’s arm length and the gun’s configuration, and it’s adjusted by changing the stock or mount position if the gun allows it.
For the red dot, the mounting height relative to the bore axis (the “cowitness” in a configuration with iron sights) needs to match your natural head position. A red dot mounted too high or too low forces you to break your cheek weld on the stock, which hurts both speed and precision.
For the scope, eye relief (the distance at which the eye needs to be positioned behind the lens to see the full image) varies by model and becomes critical on hard-recoiling guns, where insufficient eye relief exposes the shooter to a painful contact with the eyepiece upon firing.
An experienced club instructor can help you identify your dominant eye in a few minutes with a simple test, and this information should guide your sight choice even before comparing brands or prices.
Facial structure also plays an underrated role. A shooter with prominent cheekbones or thick eyeglass frames won’t perceive a red dot or a reticle the same way as a shooter without vision correction, because the distance between the eye and the optic varies depending on what’s in between. Wearing your usual glasses (or your prescribed shooting glasses) when trying out a sight is essential: a setting tested freehand without vision correction can turn out to be completely different once the glasses are on, particularly for a scope’s eye relief.
Age and the evolution of eyesight over time are another often-neglected factor. The eye’s ability to accommodate quickly between several planes, essential for iron sights, naturally declines with age, which pushes some veteran shooters to gradually turn to the red dot even in disciplines where it remains allowed, simply because visual comfort takes precedence over habits acquired over previous years. This is neither an admission of weakness nor a loss of skill, just a logical adaptation to an eye that functions differently.
Finally, eye dominance isn’t always as clear-cut as people think. Some shooters have cross-dominance (right hand, left dominant eye, or the reverse), which complicates the choice of sight and shooting stance. In this case, an instructor can propose several solutions: adapting head position, slightly occluding the non-dominant eye, or in some cases considering a reversed mounting depending on the discipline and current rules. This diagnosis is worth making early, since it durably shapes equipment choices and avoids years of unconscious, tiring compensation.
Direct comparison by discipline
To summarize the practical recommendations, here’s a condensed comparison of the three sight families across the main uses in civilian shooting sports.
- Regulated precision rifle or pistol (10 m, 25 m, 50 m): iron sights mandatory in nearly all events, no magnification or red dot allowed. Entry-level budget sufficient to start, progressive upgrade based on level.
- Dynamic shooting on cardboard or steel targets: red dot almost essential for acquisition speed, co-witnessing with iron sights recommended as backup. Budget varies depending on the robustness sought against repeated recoil.
- Casual or long-range competition shooting on a fixed target: scope with magnification suited to the distance and a graduated reticle if you want to correct without touching the turrets. Careful mounting matters as much as model choice.
- Versatile casual shooting with no fixed discipline: a red dot often remains the most versatile choice for discovering several types of targets at short and medium range, before specializing.
This comparison remains a starting point. Many shooters practice several disciplines and therefore own several guns or interchangeable mounts depending on the planned outing, which naturally spreads the investment over several seasons rather than a single purchase.
Common buying mistakes
Certain mistakes come up systematically among shooters who buy their first sight without having tested it beforehand, often influenced by videos that praise a model without specifying the context in which it was used.
The first mistake is buying a red dot for a regulated precision discipline, thinking that “more modern” means “more capable.” This reasoning simply ignores that the discipline’s rules forbid this type of sight, making the purchase unusable in competition.
The second mistake is buying a high-magnification scope for short-range shooting, thinking “seeing bigger” always helps. Excessive magnification at 25 meters narrows the field of view, makes it harder to hold the aim point on a target that moves within the optical field at the slightest tremor, and slows down target acquisition.
The third mistake is neglecting the mounting budget (rail, base, rings, screws) in favor of the sight alone. An excellent red dot or scope mounted on a poor-quality mount will lose its zero at the slightest vibration, rendering all adjustments useless after a few dozen rounds.
The fourth, more subtle mistake is copying the gear of an experienced club shooter without accounting for one’s own body shape or skill level. An experienced shooter’s gear is often tuned to the margins of their specific practice, and replicating that choice without understanding why can slow down your progress rather than speed it up.
- Always check your discipline’s exact rules before buying a sight, in particular via your federation or club.
- Always plan for a mounting budget in addition to the sight itself.
- If possible, test a club’s gear or try it during a trial session before the final purchase.
Maintenance and tracking zero over time
A well-chosen sight only keeps its effectiveness if it’s maintained and checked regularly. Zero (the setting that makes the aim point match the actual point of impact) can drift over time, through transport, shocks, or simply the wear of mounting screws.
For iron sights, maintenance stays simple: regular cleaning, checking that adjustment screws are tight, and paying attention to the iris, which can get clogged with dust from the range. A visual check before each session is generally enough.
For a red dot, battery life needs to be monitored, and it’s recommended to check zero after any somewhat rough transport (travel, the bag being dropped, changing mounts). Many shooters log the date of battery changes and zero checks in a tracking notebook, which avoids unpleasant surprises in competition.
For a scope, lens cleaning should be done with appropriate materials (microfiber cloth, specific product) so as not to scratch the optical coatings. Checking the tightness of the rings and base after each intensive shooting season is also recommended, since repeated vibration can gradually loosen the mount.
Keeping a history of your settings, sight changes, and results based on the gear used lets you objectively identify what actually works for you, rather than relying solely on how you feel in the moment. This is one of the concrete uses of a digital shooting log: linking each session to the equipment configuration used to identify real progress trends.
Overall budget and investment priorities
With a limited budget, the order of priority should follow the logic of the discipline rather than the appeal of the most visible or most talked-about gear on forums.
If you’re starting out in regulated precision, the sighting elements supplied as standard with your gun or your club rifle are more than enough for the first few seasons. Priority investment should go toward posture and stability accessories (sling, mat, shooting jacket) rather than a top-end rear sight you won’t yet fully benefit from.
If you’re starting out in dynamic shooting, a reliable entry- to mid-range red dot with a solid mount is more cost-effective than a high-end model on a low-end mount that will lose its zero. It’s better to balance the budget between the sight and its mount than to concentrate everything on one of the two.
If you’re starting out in long range, optical quality and turret repeatability take precedence over the maximum magnification advertised on the box. A well-mounted, well-tuned mid-range scope will vastly outperform a poorly mounted high-end scope.
In any case, a club instructor or an experienced shooter can help you test several configurations before buying, which remains the best way to avoid an investment poorly calibrated to your actual practice.
Technological evolution of sights: what’s really changed
The sight market has evolved a lot in recent years, and it’s useful to understand what constitutes a real technical advance versus what remains marketing, in order to distinguish a worthwhile investment from a passing trend.
The miniaturization of red dots is arguably the most concrete development for the civilian competitive shooter. Compact models that mount directly onto a handgun’s slide via a machined cut have made co-witnessing with iron sights much more natural than about fifteen years ago, when the red dot was mounted almost exclusively raised on a dedicated mount. This drop in mounting height has reduced the accommodation time between the usual shooting stance and the stance with a red dot, which partly explains its widespread adoption in dynamic shooting.
Battery life has also improved significantly. Modern electronic circuits consume noticeably less than a decade ago, with advertised battery life now counted in tens of thousands of hours for some models set at moderate brightness, versus just a few hundred or thousand hours for older generations. This never excuses skipping a battery check before a competition, but it reduces the risk of failure over the course of a season.
Optical coatings on scopes have also improved, with better light transmission and reduced glare, especially noticeable at the end of the day or in low light. This improvement benefits the casual shooter as much as the competitor, since it extends the time window during which the target remains clearly visible.
Another notable change concerns resistance to recoil shock. Early red dots meant for handguns frequently suffered from zero shifts or premature failures on hard-recoiling guns. More recent generations incorporate circuits and mounts specifically designed to withstand this type of repeated stress, which has considerably reduced this problem on mid- and high-end models.
However, one should remain cautious about marketing pitches that present every new generation as a revolution. Many recent developments are incremental improvements (better sealing, better anti-glare coating, better turret ergonomics) rather than technological breakthroughs that would fundamentally change your practice. An older model, but well-maintained, properly adjusted, and suited to your discipline, often remains more than sufficient, and there’s no need to change sights every time a new development is announced on the market.
- Miniaturization and lower mounting height have made co-witnessing on handguns easier.
- Battery life has improved significantly on recent models, without eliminating the need for regular checks.
- Scope optical coatings mainly improve clarity at the end of the day, more than the advertised maximum magnification.
- A real technological advance doesn’t automatically justify a gear change if your current equipment meets your needs.
Common adjustment mistakes once a sight is chosen
Choosing the right type of sight isn’t enough: a poor adjustment cancels out much of the expected benefit, regardless of the price paid. Some adjustment mistakes come up so often that they deserve to be detailed separately from buying mistakes.
With iron sights, the most common mistake is changing several settings at once (front sight height, iris diameter, screw tension) after a disappointing string, without isolating the responsible variable. This approach prevents understanding what actually improved or worsened the result, and can waste several entire sessions backtracking. The right method is to change only one parameter at a time, shoot a control string, then note the result before adjusting anything else.
With the red dot, the most frequent adjustment mistake concerns dot brightness. A dot set too bright indoors or in overcast conditions produces a halo that hides part of the target and degrades perceived precision, especially on distant or small targets. Conversely, a dot too dim in bright sunlight becomes hard to distinguish, which slows down visual acquisition at the worst possible moment. Many shooters who set their brightness once indoors forget to adjust it outdoors, which explains part of the underperformance observed when moving from a covered range to an outdoor one.
Zeroing itself is another classic source of error. Zeroing at a distance that doesn’t match your primary distance of use (for example, zeroing a red dot mostly used between 15 and 20 meters at 10 meters) introduces a systematic offset that isn’t immediately apparent but hurts actual precision in everyday use. The right reflex is to zero at the distance most representative of your usual practice, then check behavior at other distances afterward if needed.
With the scope, the most documented adjustment mistake concerns confusing click units (MOA or mrad depending on the model) and applying a correction in the wrong direction or with the wrong value. A shooter who adjusts their turrets without first checking which unit their scope uses can apply a wildly disproportionate correction relative to the actual deviation observed on the target. Systematically noting your scope’s unit in your shooting log, next to each applied click value, prevents this recurring confusion.
One last mistake, common to all three sight families, is changing your setting right before an important competition based on a single test string. A setting that seems better on an isolated string may simply reflect a natural variation in spread rather than a real improvement. A setting change always deserves to be confirmed over several strings, ideally under conditions close to those of the targeted competition, before being finalized.
- Change only one adjustment parameter at a time to identify what actually improves the result.
- Adjust your red dot’s brightness to current conditions, rather than setting it once and for all indoors.
- Zero at the distance most representative of your usual practice.
- Systematically check your scope’s click unit (MOA or mrad) before any turret adjustment.
- Confirm a setting change over several strings before finalizing it ahead of an important event.
Budget by practice level: casual, regular, competition
Beyond the budget by sight family detailed above, it’s useful to think in terms of overall practice level, since investment priorities change depending on whether you shoot occasionally, regularly, or in structured competition.
At the occasional casual level (a few outings a month, with no competition goal), the entry-level sighting elements or red dot supplied or offered with the gun are more than enough. At this stage, money is better invested in the ammunition needed to build up practice than in a pricier sight whose room for improvement would remain untapped for lack of sufficient shooting volume to make it worthwhile. An occasional shooter progresses more through the regularity of their sessions than by changing gear.
At the regular level (weekly or near-weekly practice, with sought-after technical progress), the budget starts to be justified for mid-range gear, particularly at the tipping point identified earlier in each section: red dot robustness in dynamic shooting, optical quality and turret repeatability at long range, finer iris and front sight tunnel adjustments in precision shooting. This is also the level at which the mounting budget (rail, base, rings) deserves a second look if the first purchases were made at the lowest price, since a fragile mount becomes the limiting factor rather than the sight itself.
At the structured competition level (regular entries in official events, tracked ranking over time), high-end gear starts to bring a real, measurable benefit, provided the shooter’s technique is already mastered enough to exploit it. This is also the level at which redundancy becomes relevant: a second red dot or systematic spare batteries, precisely logged settings to reproduce a proven configuration from one competition to the next, or even backup gear identical to the main gear so a failure doesn’t jeopardize an entire season.
A simple benchmark to avoid over-investing prematurely: if your groupings or times aren’t yet limited by gear but by your technique, your stance, or your training consistency, a pricier sight change will only bring a marginal, if any, gain. The signal that justifies an upgrade is the certainty, generally confirmed with your club instructor, that it really is the gear capping your performance, not your practice.
- Occasional casual: entry-level or factory gear, priority on ammunition and session volume.
- Regular practice: mid-range justified, including the mounting budget often neglected on the first purchase.
- Structured competition: high-end gear worthwhile, paired with gear redundancy and rigorous setting tracking.
- Before any upgrade, check with an instructor whether it’s really the gear limiting your current performance.
FAQ
Q: Can you mount a red dot on a gun used in Olympic precision shooting? A: No, regulated precision events require metallic sighting elements with no magnification or electronic device. Your federation’s rules specify exactly which sights are allowed discipline by discipline, and this should be checked before any purchase.
Q: Is a red dot suitable for versatile casual shooting with no fixed discipline? A: Yes, it’s often the most versatile choice for discovering several types of targets at short and medium range thanks to its fast acquisition. It remains, however, less suited than a scope once distance increases significantly.
Q: What dot size should you choose on a red dot for dynamic shooting? A: A larger dot (6 to 8 MOA) is acquired faster at short range but hides more of the target, while a finer dot (2 to 3 MOA) takes a bit more time but stays precise on small or distant targets. The choice mainly depends on the type of targets usually encountered in your practice.
Q: Should you co-witness a red dot with backup iron sights? A: This is a practice recommended by many experienced shooters, since a battery failure mid-string in dynamic shooting shouldn’t stop you from continuing. It requires a specific mount that lets you see the iron sights through or below the red dot’s lens.
Q: How do I know if my scope is mounted properly? A: A control shot at a known reference distance, repeated several times, should give consistent groupings with no progressive drift in the point of impact. If zero shifts after a few dozen rounds, the tightness of the base or rings is probably to blame.
Q: Is a sight’s price proportional to the performance you get? A: Not directly: a well-adjusted, well-mounted entry-level sight often outperforms an expensive model that’s poorly mounted or poorly suited to the discipline. Budget should first follow consistency with your actual practice before aiming for high-end gear.