
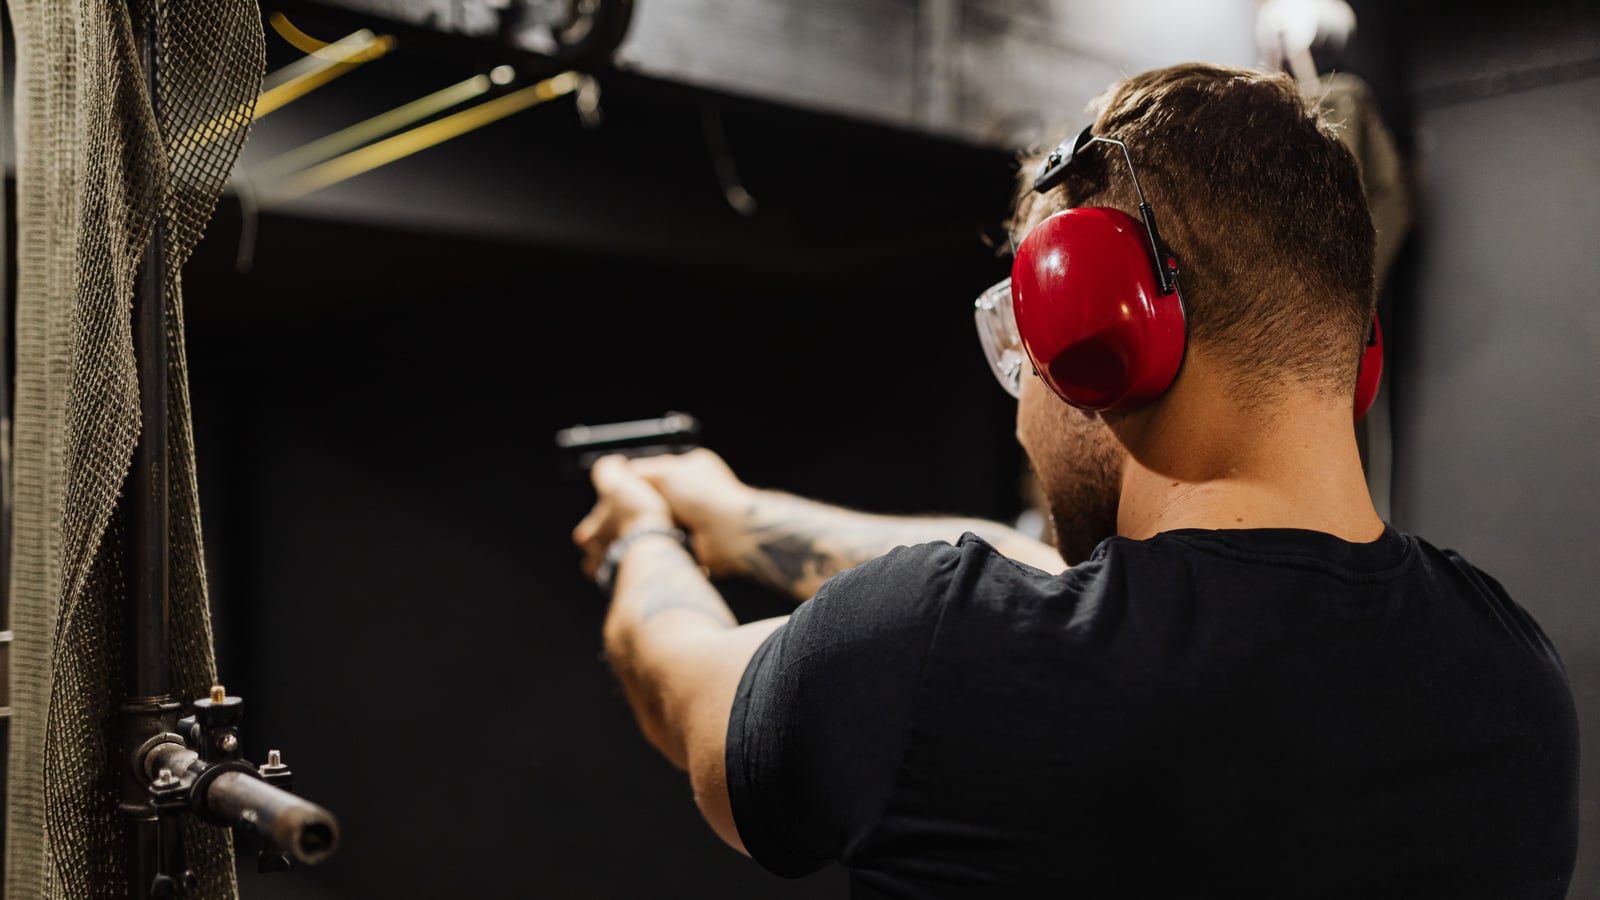
Why night shooting changes everything
A shooting session in complete darkness isn’t a classic session with just less light. Every usual visual cue disappears or gets distorted: distance seems different, sights become hard to make out, and your perception of the area behind the target shrinks drastically.
This difference isn’t trivial. It forces you to rethink your whole method: how you load, how you aim, how you communicate with other shooters on the line, and above all how you identify what’s in front of and behind the impact. A routine gesture in daylight demands heightened attention as soon as ambient light drops.
Night shooting is attracting more and more club members curious to step outside their comfort zone, but it remains a supervised practice that you don’t improvise. This guide details the real constraints darkness places on a shooting range, the lighting equipment allowed and its limits, and the disciplines that offer this format in clubs.
The goal isn’t to dramatize a practice that stays safe when well prepared, but to give you an honest picture of the extra demands it involves, so you can approach it with the right reflexes from your very first session.
Target identification in low-light conditions
The fundamental principle of sport shooting stays the same day or night: you must positively identify your target and what surrounds it before firing. What changes radically is how hard it is to apply that principle when your eyes no longer have the usual information.
In darkness, peripheral vision becomes dominant and color perception almost entirely fades in favor of brightness contrast. A cardboard target that’s clearly visible in daylight can turn into a plain dark mass, hard to distinguish from the background, if it isn’t properly lit or backlit by the range’s setup.
This constraint imposes a simple but non-negotiable rule: never engage a target you can’t see clearly, even under the pressure of a timer or competition atmosphere. An experienced instructor will systematically insist on this point at the start of a session, even before touching on the technical aspects of shooting.
The area beyond the target poses an identical problem, often underestimated by shooters new to the discipline. The “background” of a night shooting range needs to be checked in advance by the club’s organization, with backstops and safety devices specifically designed for darkness, not simply carried over as-is from daytime sessions.
The human eye takes several dozen minutes to fully adapt to darkness, a phenomenon known as scotopic adaptation. This process is fragile: a single uncontrolled bright light source is enough to cancel it out completely, forcing the eye to start adapting all over again.
On a night range, that means a poorly aimed headlamp flash, a nearby shooter’s phone screen lighting up, or even the headlights of an approaching vehicle can destroy an entire group’s adaptation in a second. Collective discipline around managing ambient light is therefore not a matter of comfort — it’s a shared safety condition.
Clubs that organize this type of session generally set strict rules on the use of personal lighting between shooting phases: lamps pointed at the ground, phone screens banned on the line, limited movement during active phases. These rules may seem restrictive at first, but they directly determine the visual quality of the whole group.
An experienced club shooter knows it’s better to arrive early and let their eyes gradually adjust to the dim light rather than stepping out of a lit vehicle and getting straight onto the line. This simple bit of forethought noticeably improves the quality of the evening’s first string.
Weapon-mounted lights and their regulatory framework
Lighting equipment used in sport night shooting falls essentially into two categories: lights mounted on the weapon and lights carried separately by the shooter. Each category meets different needs and comes with distinct constraints around mounting, weight, and beam management.
A light mounted on a rail under the barrel of a category B or C weapon changes the weapon’s overall balance and may require adjusting your grip. This type of accessory should be chosen based on the weapon model and tested repeatedly in daytime configuration before any nighttime use, to check it doesn’t interfere with the cycling of the action or with the sight line.
Mounting accessories on a weapon remains governed by the regulations that apply to that weapon’s category: what’s tolerated as an accessory on a freely sold category C weapon isn’t automatically transferable to a category B weapon subject to prefectural authorization. If in doubt about whether a mount complies, the safest bet is to check directly with your gunsmith or club, since the precise rules vary by equipment type.
Beam power also deserves particular attention. A light that’s too powerful used at close range on a shooting line can dazzle neighboring shooters or create annoying glare on hearing and eye protection. Model choice should therefore be based on the range’s setup, not just on the maximum power available on the market.
Beyond lighting the target, aiming itself poses a specific challenge at night. Classic mechanical sights, which rely on the contrast between front and rear sight, lose much of their readability as soon as ambient light drops.
Red dots, with their built-in illuminated reticle, retain better visibility in darkness, provided their brightness is adjusted to the actual ambient light level. A reticle set for daytime use generally appears far too dim at night, while a poorly anticipated night setting can conversely dazzle the shooter if light suddenly returns.
Some sights include phosphorescent or tritium elements that stay visible without an external power source. This type of equipment, common on certain competition weapons, requires a specific learning period, as perceiving these light points differs noticeably from perceiving a classic electronic red dot.
In every case, the rule remains the same as for general lighting: test your gear extensively under real conditions before a session or competition, rather than discovering your settings on the day. A regional champion who regularly practices this format often points out that one test session in full night configuration is worth more than ten readings of the manual.
Physical setup of a night shooting range at the club
A club offering night shooting sessions has to physically adapt its infrastructure, not just its schedule. General site lighting, reception areas, the paths between the parking lot and the range, and safety zones all need to be designed for reduced visibility.
The targets themselves often need a dedicated lighting or backlighting setup, positioned so it never bounces direct light back toward the shooters. This technical requirement calls for a specific installation, different from simply pointing a floodlight at the shooting area, which would create more glare than useful visibility.
Site signage, safety instruction panels, and circulation zones need to stay legible despite the darkness, with reflective elements or low-intensity ambient lighting that doesn’t disturb the visual adaptation of shooters already set up on the line.
A serious club generally runs an enhanced safety briefing before any night session, more detailed than the usual daytime briefing, with an explicit reminder of off-limits zones, movement instructions, and what to do in case of a lighting or shooting incident.
In low-light conditions, verbal communication takes on outsized importance compared to daytime sessions. Usual gestures and visual signals, often used to flag a shooting incident or a pause, become hard to perceive as soon as distance or darkness makes them barely legible.
The range officer’s commands therefore need to be clear, systematic, and loud enough to be heard despite hearing protection. Some clubs add standardized light signals, such as specific colored flashes, to back up voice commands in case there’s any doubt they were properly received.
Shooters themselves need to communicate more explicitly than in daylight: verbally reporting a shooting incident, a reloading difficulty, or a lighting problem rather than relying on the instructor noticing the situation visually. This communication discipline noticeably reduces the risk of misunderstanding on the line.
An experienced instructor running this type of session generally insists on repeating commands and on verbally confirming each sensitive step, from loading through the end of a string, rather than relying solely on the usual visual cues.
Disciplines that practice night shooting at clubs
Several disciplines regularly offer night sessions within FFTir-affiliated clubs, each with its own format constraints. Precision shooting on fixed targets remains the most accessible for a first attempt, since it limits movement and concentrates attention on target identification and lighting adjustment.
Dynamic disciplines, where the shooter moves between several firing positions with cardboard targets or metal plates, require a higher skill level before practicing at night. Combining movement, loading, and target identification in darkness multiplies the points requiring vigilance compared to a static session.
Metal animal silhouettes, used in some club formats, lend themselves well to night shooting once properly lit or fitted with reflective devices, since their characteristic shape stays identifiable even with reduced contrast. This format lets you work on rapid target identification under conditions close to a daytime competition, with the added constraint of darkness.
Some clubs also organize mixed sessions combining precision shooting with a simple course, designed as a gradual introduction to the night format rather than a competition in its own right. This type of session lets curious shooters discover the constraints of night shooting without the pressure of a timer or ranking.
Hearing and eye protection specific to nighttime
Choosing hearing and eye protection deserves particular attention in nighttime conditions. Tinted shooting glasses, perfectly suited to a very bright daytime session, become counterproductive at night since they further reduce already limited brightness.
Clear or slightly yellow lenses, which improve contrast without darkening the scene, are generally better suited to this context. The precise choice, however, depends on the site’s lighting and the discipline being practiced, which makes checking beforehand with the club or instructor more reliable than a universal rule.
On the hearing protection side, electronic earmuffs that amplify ambient sounds while cutting impulse noise become more valuable at night, since hearing becomes an important compensating sense when vision is reduced. Clearly hearing commands and surrounding range sounds helps make up for the loss of visual cues.
In every case, no protection should further restrict the peripheral field of view already reduced by darkness. Equipment that’s too enclosing or poorly fitted can create a tunnel-vision sensation that adds to the difficulties already present, and it’s better to fix that before the session than to discover it on the line.
Maintenance and checking of lighting equipment
A light or red dot that works perfectly during a quick indoor test can behave differently after several dozen minutes of continuous outdoor use, especially in cold weather. Managing battery life becomes a standalone point of vigilance for any extended night shooting session.
It’s recommended to always carry a spare set of batteries or a backup light in your bag, separate from your main equipment, so you’re never left without lighting mid-session. This simple precaution avoids abruptly interrupting a session over a battery issue that could have been anticipated.
The mechanical mounting of weapon-mounted lights also deserves a systematic check before each session. Repeated shooting vibrations can gradually loosen a poorly tightened mount, risking a shifted beam or the outright loss of the accessory during use.
An experienced club shooter gets into the habit of testing their full lighting setup a few days before a night session, rather than the night before. This time margin lets them replace a faulty part without stress and without last-minute improvisation.
Managing the stress and mental load specific to darkness
Darkness changes the mental load of a shooting session well beyond the simple question of visibility. A shooter used to their daytime cues may feel a diffuse sense of discomfort the first time they’re on a range plunged into dim light, even with no real danger present.
This reaction is completely normal. The human brain naturally associates darkness with heightened alertness, which can show up as shorter breathing, a tenser grip on the weapon, or a tendency to rush gestures that should, on the contrary, be slowed down. Recognizing this effect helps manage it rather than suffer through it without understanding where the tension comes from.
Breathing remains the simplest tool against this rise in stress. Taking a few extra seconds before each string to breathe calmly, rather than rushing because the environment feels less familiar, improves both safety and shooting quality. An experienced instructor often points out that a tense shooter makes more handling errors than a relaxed one, at night as in daylight.
Repetition remains the best remedy for this mental load. The more supervised night sessions a shooter accumulates, the more automatic their gestures become and the more their attention can refocus on the essentials: target identification and line safety. What feels grueling during a first session quickly becomes a mastered routine after a few outings.
Independent of any weapon mount, the light carried by the shooter themselves plays a central role in a well-organized night session. It’s used to move safely between stations, prepare gear, or check a shooting log without disturbing the rest of the group’s visual adaptation.
The choice generally goes to a model offering several intensity levels, with a dedicated very-low mode for close-range handling and a stronger mode reserved for longer movements. A light with only one intensity level, often too high, quickly becomes a problem at a site where several shooters share the same space.
Beam tint matters too. Red or amber light disturbs scotopic adaptation much less than classic white light, which is why many clubs recommend this type of filter for personal lights used between active shooting phases. This simple choice limits the impact of an accidental switch-on on the group’s vision.
The light’s position also matters: a headlamp, convenient for keeping hands free, must systematically be turned off or pointed at the ground as soon as a shooter turns toward others, to avoid directly dazzling anyone who’s facing them. This simple rule, often repeated at the start of a session, prevents the main incident linked to individual lighting.
Weather and outdoor environment in night shooting
Weather conditions carry particular weight during a night session, even more than during a classic daytime one. Fog, light rain, or simply high ambient humidity scatter the light from floodlights and lamps, which can create a halo that further reduces visibility already limited by darkness.
Wind also deserves heightened attention, since it becomes harder to assess visually at night. In daylight, a shooter can watch the movement of grass, smoke, or a flag to gauge wind strength and direction; these visual cues disappear or become much less reliable in darkness, which complicates estimation for disciplines sensitive to this factor.
The temperature drop that comes with nightfall also affects how some equipment behaves, notably the battery life of electronic devices and the readability of some illuminated reticles whose intensity can vary with cold. A shooter planning a long winter session would do well to check this beforehand rather than discover it on site.
A club that regularly organizes night sessions typically factors these weather parameters into its decision to hold or cancel a session, with a wider safety margin than for an equivalent daytime session. This extra caution simply reflects the fact that darkness leaves less room for improvisation when conditions deteriorate.
Most shooters discover night shooting in a club setting, during a specific session organized by their club and supervised by an experienced instructor or range officer. This setting remains the most suitable for a first attempt, since it allows for guided progression and immediate correction of handling errors.
Some competitions include night or low-light events in their format, with precise rules on allowed equipment and how the event unfolds. These rules vary noticeably from one discipline to another and from one organizer to another, which makes carefully reading each event’s specific rulebook essential before showing up.
The main difference between a club session and a competition event lies in time pressure. A training session leaves time to stop, readjust your gear, or ask the instructor for clarification again, whereas a timed event forces you to manage those same constraints under additional pressure. That’s precisely why it’s not advisable to approach your first night shooting experience directly in a competition setting.
A competitor who wants to specialize in night events would do well to rack up plenty of club training sessions before entering an official event, so they arrive with already well-drilled reflexes rather than discovering the constraints of darkness at the same time as competition pressure.
Transport and handling of equipment before nightfall
Preparing equipment before a night session is best done entirely in full daylight, whether at home or upon arriving at the site before sunset. Checking each light’s function, battery condition, mount tightness, and backup accessory availability becomes much more tedious and error-prone once night has fallen.
Transporting the weapon and lighting accessories to the site follows the same rules as any shooting outing: weapon unloaded, carried in its case, accessories removed or protected during transport. Adding a lighting accessory changes nothing about these basic obligations, which remain valid regardless of the session’s time.
Once on site, it’s useful to organize your station so you can find every item without groping around in the dark: backup batteries, adjustment tools, shooting log — everything should have a fixed, memorized place before night falls. This simple organization avoids a lot of wasted time and frustration once natural light is gone.
A shooter who regularly takes part in this type of session quickly develops an almost identical preparation routine for each outing, which reduces the risk of forgetting something and speeds up getting set up on the line. This routine, built session after session, becomes a safety asset in its own right.
Personal preparation before a first night session
A shooter discovering the night format would do well to start with a supervised static precision session rather than jumping straight into a dynamic format. This progression lets you get used to the sensations specific to darkness before adding the complexity of movement.
Arriving early enough to let your eyes adapt, preparing your equipment in full light before nightfall, and double-checking each personal light source noticeably reduces the stress felt during the first minutes on the line.
It’s also useful to plan clothing suited to the temperature drop that generally comes with nightfall, particularly for sessions that stretch over several dozen minutes in a static position. Cold affects hand dexterity and can make handling gestures already made harder by darkness even more complicated.
Finally, it’s better to approach your first night session with a goal of discovery rather than performance. The priority remains understanding how your body and equipment react to this particular context, before trying to reproduce your usual daytime results.
Progressing in night shooting follows a different logic than progressing in daytime shooting, since the cues you need to automate aren’t the same. Where a daytime session often focuses on grouping precision or execution speed, a first phase of night sessions benefits from focusing almost exclusively on lighting management and target identification.
A realistic progression plan starts with one or two sessions entirely devoted to handling in low-light conditions, with no performance goal: loading, unloading, changing position, managing your light, all done slowly and under direct supervision. This phase may feel frustrating for a shooter already experienced by day, but it builds the reflexes that will make subsequent sessions far smoother.
Once these basic gestures are internalized, the shooter can gradually reintroduce speed and precision, always keeping safety and target identification as non-negotiable priorities. A well-structured club often offers this kind of staged progression, with an instructor validating each step before allowing the move to the next.
Keeping a shooting log dedicated to night sessions, separate from the usual daytime tracking, lets you objectively measure this progress: felt adaptation time, difficulties encountered with a given piece of equipment, adjustments made from one session to the next. This structured tracking helps quickly identify what’s working and what deserves revisiting before the next outing.
Common mistakes among shooters starting the night format
Certain mistakes come up regularly among shooters approaching night shooting without sufficient preparation. The first is underestimating visual adaptation time and wanting to shoot right upon arrival, while the eyes haven’t yet switched to night vision. This rush usually results in slower, less reliable target identification at the start of the session.
The second common mistake concerns managing personal lighting: switching on your headlamp at full intensity to check a detail, without thinking about the impact of that gesture on neighboring shooters already adapted to darkness. This kind of slip, often unintentional, remains one of the main sources of tension on a busy night range.
The third mistake is neglecting to test your lighting equipment beforehand, assuming a red dot or light that works well by day will automatically behave the same way at night. Intensity settings in particular almost always need a specific adjustment that only a real test under night conditions can reveal.
Finally, some shooters underestimate the physical toll of the heightened concentration a night session demands. Body and mind tire faster when every gesture requires increased vigilance, which argues for shorter initial sessions than usual daytime ones, gradually extending duration as experience builds.
Role of the range officer and shared responsibilities at night
The range officer’s role becomes even more central during a night session than during a daytime one. It’s the range officer who validates safety conditions before the session starts, who allows or halts shooting depending on the quality of the lighting available, and who arbitrates in real time any ambiguous situation related to visibility.
This increased responsibility is why clubs entrust the supervision of night sessions to experienced range officers already well-versed in the specifics of this format, rather than to an instructor discovering the exercise at the same time as the participants. The supervisor’s experience makes a direct difference in how well the unexpected is handled.
Responsibility, however, doesn’t rest solely with the supervisor. Every shooter present shares responsibility for flagging a situation that seems dangerous to them, whether it’s faulty lighting, a poorly identifiable target, or another participant’s behavior that doesn’t follow light-management instructions. This shared vigilance is a safety principle that holds day and night alike, but takes on particular weight when margins for error shrink.
A club that structures its night sessions well systematically reminds everyone at the start of a session that anyone present can request an immediate halt to shooting if in doubt, without waiting for the supervisor’s validation. This simple reflex, hammered home at every session, remains the best guarantee against avoidable incidents linked to poor visibility.
Maintaining the weapon after a night session deserves the same rigor as after a daytime one, with a few additional points of vigilance. Ambient humidity, often higher in the evening than during the day, promotes condensation on metal when the weapon moves from a cool outdoor environment to a heated indoor one back at the club.
It’s recommended to let the weapon gradually reach room temperature before cleaning it, to avoid moisture settling into hard-to-reach areas. This simple precaution, often neglected after a long session when fatigue sets in, effectively protects against corrosion over the medium term.
Lighting accessories also deserve a check after every outing: removing batteries if the gear will be stored for a long time, visually checking the seals on lights used outdoors, and cleaning lenses that may have picked up dust or moisture during the session. Poorly maintained accessories quickly lose reliability, which becomes a direct safety issue at the next session.
Storing your lighting equipment separately from the weapon itself, in a dry, clearly identified space, also makes preparing for the next night outing easier. An organized shooter who instantly finds every piece of their gear saves valuable time and reduces the risk of forgetting something when heading back to the club.
This maintenance discipline, applied session after session, noticeably extends the lifespan of lighting equipment and reduces the number of failures encountered on the range. It ties into the overall logic of this guide: calm, confident night practice rests above all on meticulous preparation repeated over time, far more than on high-end equipment used without method.
That same logic applies to the whole journey described in this article: the success of a night shooting session depends less on how sophisticated the equipment is than on the rigor with which every step is prepared, checked, and repeated. A shooter who patiently builds their night reflexes, session after session, eventually finds the same ease in this format that they already know in daylight, while keeping the heightened vigilance this context demands over the long run.
FAQ
Q: Is night shooting open to all FFTir license holders? A: It depends on the club and the discipline practiced, as some clubs reserve this format for shooters who already have a minimum skill level. It’s best to check directly with your club about the access conditions for this type of session.
Q: Can you mount any light on your competition weapon? A: No, mounting accessories depends on the weapon’s category and the type of rail available, and must remain compatible with the cycling of the action. If in doubt, a gunsmith or the club can confirm whether a given mount is suitable.
Q: Does equipment need to differ depending on the discipline practiced at night? A: Yes, a static precision session and a dynamic format don’t impose the same lighting constraints or the same adaptation time. Equipment should always be chosen based on the format actually being practiced, not generically.
Q: How long does it take for eyes to adapt to darkness? A: Full adaptation generally takes several dozen minutes and can be canceled by a single poorly controlled bright light source. That’s why collective lighting management on the range is a strict rule in most clubs.
Q: Are red dots mandatory for night shooting? A: No, but they generally offer better visibility than classic mechanical sights in darkness, provided their brightness is adjusted. Some shooters also use sights with phosphorescent elements, which require a specific learning period.
Q: What should you do if your light fails during a session? A: You need to immediately report the incident verbally to the range officer rather than continuing to shoot in poor visibility conditions. Always carrying a backup light source in your bag helps avoid this kind of situation.