
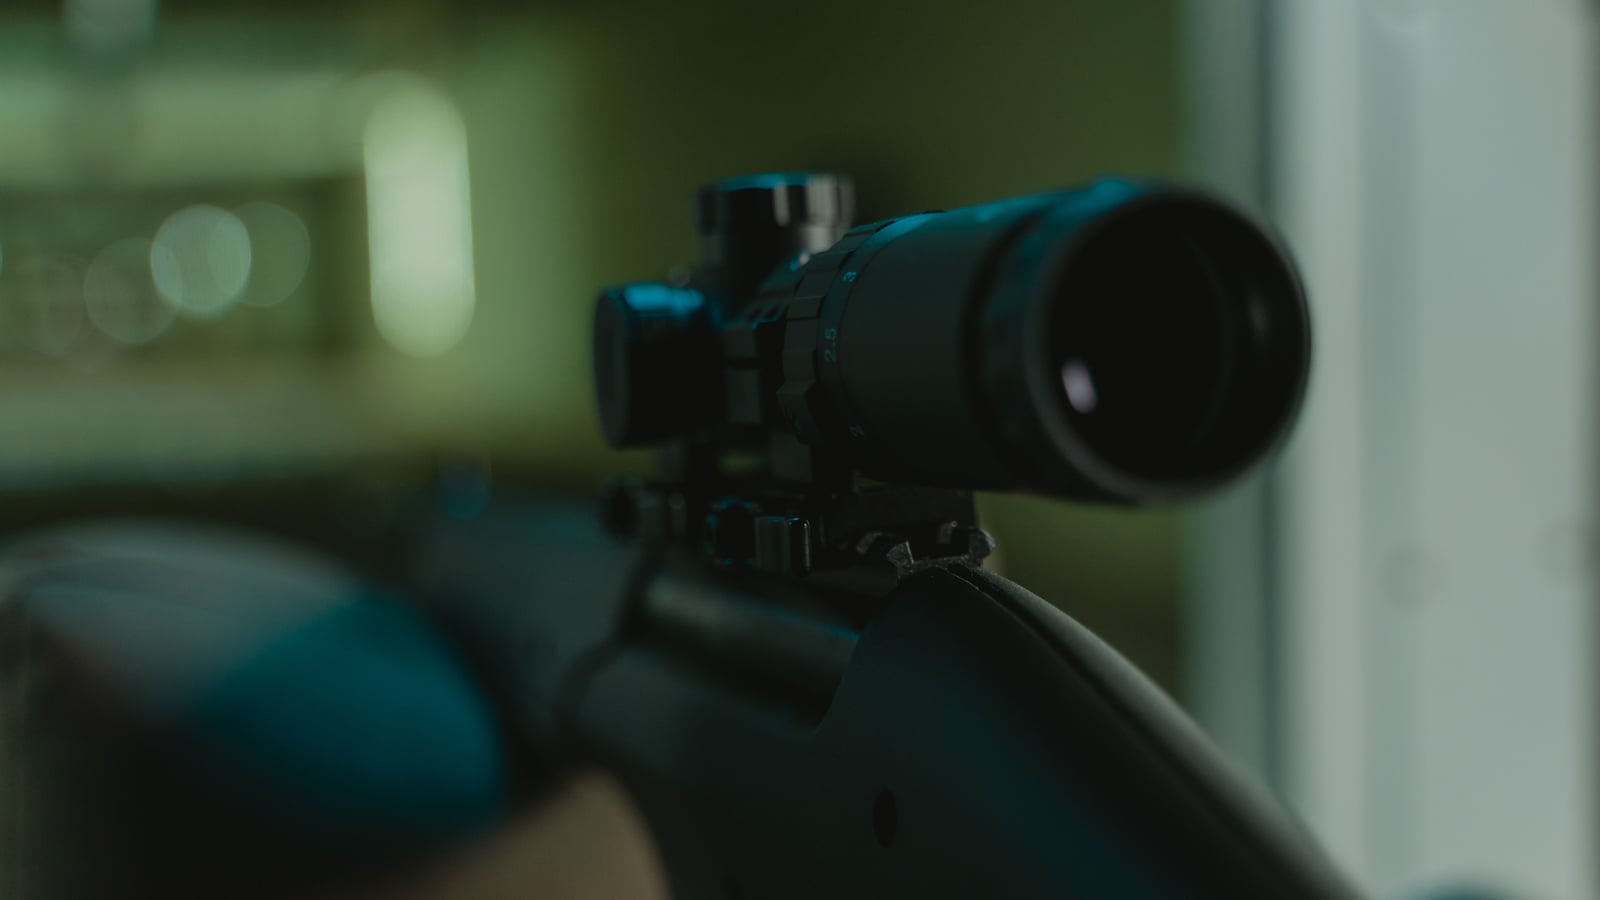
Why your optic deserves its own maintenance routine
Everyone knows a rifle or handgun needs cleaning after every session. The optic mounted on it, though, often gets forgotten. Yet a scope, red dot, or aperture sight is an optical and electronic precision instrument, not a simple accessory you screw on and forget.
The logic is simple: your accuracy depends as much on your optic’s zero as on the barrel itself. A dirty lens, a seal that’s taken on moisture, or a dead battery at the wrong moment, and the whole precision chain collapses, regardless of the quality of your gun or ammunition.
Unlike the barrel or the action, an optic combines several different vulnerabilities: coated glass surfaces that scratch easily, seals that age, electronics that drain a battery, and mechanical elevation and windage adjustments that can shift under transport shocks.
This variety of components means optic maintenance can’t be summed up as “wipe it with a cloth now and then.” You need a routine covering optical cleaning, waterproofing checks, zero verification, and power management for red dot models.
A shooter who neglects their optic often discovers the problem at the worst moment: mid-competition, when the point of impact no longer matches expectations, or when the red dot’s diode refuses to light up right before a timed string starts.
This guide covers the five pillars of that maintenance: cleaning the lenses, preserving waterproofing, systematically checking zero after transport, replacing the battery on a red dot, and storage that protects the optic from moisture between outings.
Cleaning the lenses without damaging them
The lenses of a scope or red dot carry multi-layer optical coatings that improve light transmission and reduce glare. These coatings are thin and fragile: a bad cleaning move can scratch them irreversibly, far more easily than you’d think.
The first rule is to remove dust and solid particles before any cloth touches the lens. Fine dust or a grain of sand trapped between fabric and glass acts like sandpaper at the slightest friction, even light.
- First use a blower bulb or an ultra-soft brush dedicated to optics to clear surface particles, never rubbing at this stage.
- Then go over it with a clean microfiber cloth reserved exclusively for the optic and never used for anything else (especially not the gun itself).
- For more stubborn marks (fingerprints, splatter), use a cleaning solution made specifically for optics, never a household product or strong alcohol that can attack surface coatings.
- Apply the liquid to the cloth, never directly to the lens, so it doesn’t seep under the eyepiece or objective seals.
- Clean with light circular motions, from the center outward, never pressing hard.
- Let it air-dry a few seconds before putting the protective caps back on.
The microfiber cloth itself must stay clean. A cloth that’s accumulated dust or sand in its fibers becomes an abrasive tool instead of a cleaning one, even if it looks clean to the naked eye.
For the aperture sight of an Olympic precision rifle, the principle is the same: it’s a simple optical part but sensitive to scratches, and regular cleaning with a dedicated cloth prevents residue buildup that can slightly distort the sight picture.
Cleaning frequency depends directly on shooting conditions. A session in a climate-controlled indoor range barely soils the lenses: some fine dust, occasionally a fingerprint from handling the optic. An outdoor session, in wind or dust at a field range, deposits far more particles and justifies a systematic check at the end of the session rather than occasional cleaning.
Shooting in the rain adds another difficulty: drops that dry on the lens leave mineral traces, especially if the water contains lime. Rubbing dry on a lens that just dried with this kind of mark is like rubbing over micro-crystals, which wears the optical coating faster than normal cleaning. Better to re-moisten lightly with the dedicated product before rubbing.
A useful technical point: some modern anti-reflective coatings are “hydrophobic,” which actually makes cleaning easier by preventing water and greasy marks from adhering strongly to the surface. That’s no reason to neglect maintenance, but it explains why two optics from different generations don’t require exactly the same cleaning effort for a comparable result.
Some shooters are tempted to blow directly with their mouth to clear dust. Bad idea: saliva sprayed as micro-droplets leaves residue that, once dried, is harder to remove than dry dust.
An often-forgotten point: the front and rear protective caps (often called “flip caps”) also need to stay clean inside. A cap that closes over a lens on top of a dust residue recreates the problem every time it’s put back on.
Waterproofing: what really protects the inside of the optic
A decent-quality scope or red dot is marketed as waterproof, generally via an internal nitrogen or argon purge that prevents internal fogging and limits corrosion of internal components. This waterproofing relies entirely on O-rings which, over time and with shocks, can degrade.
Waterproofing isn’t a permanent state acquired at purchase: it’s a property that can deteriorate gradually, especially after an impact, a drop, or simply several years of use and temperature swings.
- Regularly check the condition of visible seals at the adjustment turrets (elevation, windage, parallax if present): a seal that looks cracked, hardened, or slightly detached is a warning sign.
- Never disassemble the adjustment turrets or the housing of a waterproof optic yourself to “look inside”: every uncontrolled opening exposes the seals to the risk of improper reassembly.
- After a fall or a significant impact against a hard structure, the most reliable sign of a loss of waterproofing is fogging appearing inside the glass (between the lenses, not on the surface) during a sudden temperature change.
- If internal fogging appears, stop using the optic in wet conditions and have it checked by a specialized repair shop or the manufacturer rather than attempting a DIY teardown.
- Store the optic with its protective caps in place systematically, even during a short transport between the car and the firing line: this limits direct exposure of the seals to splashes and ambient humidity.
Long-term storage also affects seal lifespan. An optic left for months in a very hot (car trunk in summer) or very cold environment goes through expansion and contraction cycles that fatigue seals faster than tempered storage.
For battery-powered red dots, a failing seal around the battery compartment is a common source of trouble: moisture seeping in can corrode the electrical contacts long before the rest of the optic is affected.
A simple, low-cost test to perform once or twice a year on an optic that has some age on it or has taken hits: expose it to a sharp temperature change (coming from a cold environment into a warm interior) and immediately watch for fogging inside the tube. No fogging is a good indicator, even though it doesn’t guarantee total long-term waterproofing.
The age of the optic also plays a role that’s often underestimated. A scope or red dot several years old, even well maintained, has had its seals go through dozens of thermal cycles and outdoor UV exposure. O-ring rubber naturally stiffens over time, a phenomenon no maintenance can fully stop, only slow down.
Purchase price is also no automatic guarantee of lasting waterproofing. A properly maintained, never-abused entry-level optic can easily go years without issue, while a high-end optic that’s taken several transport shocks can develop a waterproofing fault much sooner than expected. Maintenance and handling matter at least as much as price range.
For shooters practicing in extreme conditions — winter shooting in severe cold, sessions in blazing sun and summer heat — repeated swings from one extreme to the other in the same day (gun coming out of a warm car into a cold firing line, then back) are probably the toughest scenario for the seals. Limiting abrupt back-and-forths between very different environments, when possible, extends the waterproofing’s lifespan.
Checking zero after every transport
“Zero” is the setting that makes the aimed point match the actual point of impact at a given distance. It’s the most valuable setting in the whole shooting chain, and also the one that can shift silently without you noticing until you’re at the firing line.
Transport is the riskiest moment for zero. A gun laid in a case, loaded into a car trunk, subjected to vibrations on the road or a jolt when taking it out: all of that can slightly move the adjustment turrets or loosen the optic’s mount on the rail.
- Before any serious session (competition, timed training), systematically plan a few confirmation shots at a known distance to check that the point of impact still matches the expected setting.
- Never rely solely on the fact that “the turrets haven’t visibly moved”: slight play in the mount can shift zero without the turret markings changing apparent position.
- Also check the tightness of the rings or the rail-to-optic mount after a long transport or after storing the gun in a rigid case: a screw slightly loosened by vibration can be enough to shift the point of impact.
- Note the number of elevation and windage clicks used at the last known setting, so you can quickly compare if doubt arises after transport.
- For a non-magnified red dot, the check is quicker (a few shots at short range usually suffice), but it’s just as necessary: a red dot whose mount has shifted slightly gives a false impression of accuracy until you verify on target.
A particularly rough transport — a flight with the gun in the hold in a dedicated case, a trip on a very rough road, an accidental drop of the case — justifies a more thorough check than a simple pre-session routine.
Many experienced shooters follow a simple rule: never enter a competition or important match without a zero check the day before or the same day, even if the gun “logically” shouldn’t have moved since the last outing. That discipline costs a few rounds but avoids a nasty surprise mid-course.
For a precision sport rifle equipped with an aperture sight and front sight, the principle is identical even though the components are purely mechanical: an impact on the aperture sight can slightly deform its mount, which also justifies checking the grouping before an important session.
The check method itself deserves to be structured rather than improvised. Firing three to five rounds at a fresh target, at a reference distance that’s always the same, gives a grouping clear enough to judge whether the mean point matches the expected setting. Comparing this grouping to a reference target kept from the last known setting is more reliable than an “eyeball” judgment on the day’s target with no point of comparison.
A consistent shift in one specific direction (always right, always lower) points to a different cause than a random shift. A constant shift suggests more a mount that’s moved or a setting that’s drifted; a grouping that widens without a coherent direction suggests more a shooting form or ammunition issue than the optic itself.
Some long-range precision shooters keep a small notebook or a card per gun with the date, shooting distance, number of elevation and windage clicks, and a photo or sketch of the grouping obtained. This rigor, which may seem excessive for recreational shooting, becomes valuable for anyone who regularly changes ammunition, distance, or optic configuration.
Replacing a red dot’s battery without a nasty surprise
A red dot, unlike a classic scope, depends entirely on a battery to project the illuminated dot. A weak or dead battery turns a red dot into a useless piece of glass, often right when you need it most.
Red dot battery life varies enormously depending on the model, chosen brightness, and diode technology. Some recent models advertise tens of thousands of hours of runtime at moderate brightness, others drain much faster, especially at high brightness settings in bright sunlight.
- Check the battery’s condition before every important outing rather than relying solely on a theoretical lifespan estimate: turn the red dot on for a few seconds and observe the sharpness and stability of the dot.
- Always keep a spare battery of the right format in your range bag: the exact format (often CR2032 or equivalent depending on the model) varies from one manufacturer to another, so check your optic’s precise reference rather than assuming universal compatibility.
- Some models have an auto-shutoff function after a period of inactivity, designed specifically to save the battery: check whether this function exists on your model and how it reactivates.
- After a battery replacement, always recheck zero: on some models, opening the battery compartment can slightly stress the housing or the seal, and it’s worth confirming nothing has shifted before serious use.
- Clean the electrical contacts (battery and compartment) with a dry cloth before installing a new battery: a slightly oxidized or dirty contact can cause an unstable power supply, with a red dot flickering or dimming without the battery actually being at fault.
- Always store a spare fresh battery separately, not in the optic’s compartment, to avoid any parasitic drain from contact with other metal objects in the bag.
A red dot left on continuously, even at low brightness, drains faster than a red dot turned off between sessions. Making a habit of switching it off systematically at the end of a session, rather than just storing it turned on in the case, noticeably extends real-world battery life over time.
For shooters practicing dynamic disciplines where the red dot runs at higher brightness to stay visible in daylight, consumption is logically faster, and more frequent battery checks become all the more useful.
Some high-end models use a solar capture system to supplement the battery, which extends runtime without ever making it fully independent of the backup battery. Even on these models, keeping a spare battery remains a basic precaution, not a superfluous option.
Moisture-proof storage between sessions
Moisture is the silent enemy of an optic, far more insidious than a visible impact. It gradually attacks the lenses’ surface coatings, promotes corrosion of electrical contacts, and accelerates seal fatigue.
The simplest and most effective reflex is to never store a wet optic directly in a hermetically sealed case. Moisture trapped in a confined space with no air circulation creates exactly the conditions that promote corrosion and internal fogging.
- After a session in rain or heavy ambient humidity, carefully wipe the outside of the optic and let it air-dry for a few minutes before storing it in its case.
- Use silica gel packets in the transport bag or the gun’s storage case, renewing or regenerating them regularly per the product’s instructions.
- For long-term storage (gun stored for several weeks unused), favor a cabinet or safe with good humidity control over a closed case in an unventilated environment.
- Avoid storing the gun and its optic in a garage or space subject to strong temperature and humidity swings (hot, humid summer, cold winter with condensation) without extra protection.
- Periodically check, even on an optic that’s never been dropped or exposed to heavy rain, for the absence of internal fogging or corrosion marks on visible metal parts.
The regional climate directly influences the level of vigilance needed. Coastal storage, with salt- and moisture-laden air, requires more sustained attention than a dry, temperate inland climate.
Transport in a soft case presents a different risk than storage in a rigid case: the soft case sometimes lets more ambient humidity through, but traps less confined air than a poorly ventilated hermetic case. Neither solution is perfect; the right reflex remains never sealing up a still-wet optic, regardless of the container.
For shooters practicing outdoors year-round, a small end-of-session ritual — quick visual check of the optic, wipe with a dry cloth, checking the silica packet’s condition — takes two minutes and prevents most moisture-related issues over time.
The rail-to-optic mount: a control point too often ignored
The mount that fixes the optic to the gun’s rail is an essential mechanical link in the whole precision chain, and deserves checking just as regularly as the lenses themselves. A poorly tightened mount cancels out all the benefit of a perfectly clean, well-adjusted optic.
The tightening torque of the mount screws isn’t a rough guess: too tight, it can damage the optic’s tube or slightly deform the rail; not tight enough, it leaves play that shifts zero at the slightest transport shock.
- Use a suitable torque wrench when the mount manufacturer specifies a precise tightening torque, rather than tightening “by feel.”
- Check the tightness of the mount screws at regular intervals, not only after a visible impact: repeated transport vibrations can gradually loosen a mount even without a sharp impact.
- Also check the condition of the rail itself: a slightly warped rail or one with worn notches can prevent a perfectly stable mount even with correct optic tightening.
- If you change mount or optic, always plan a new zero setting session: a different mount, even the same model, can introduce a very slight shift compared to the previous setting.
A quick-release mount that’s frequently removed and reinstalled, for example to alternate between a red dot and a mechanical sight system on the same gun, requires particular vigilance: every removal-reinstallation cycle is an opportunity for a slight shift to creep in, even with a system advertised as “return to zero.”
Protecting the optic during transport, focus, and parallax
Routine maintenance is useless if the optic takes avoidable hits between sessions. How you transport your gun directly influences the frequency of zero, waterproofing, and lens scratch issues.
- Prefer a rigid case with custom-cut foam over a simple soft case for any car or plane trip: the foam absorbs shocks and immobilizes the gun to avoid repeated rubbing of the optic against the walls.
- Avoid setting the gun down optic-side-first on a hard surface, even briefly while rummaging through a bag: this kind of harmless-seeming gesture is a frequent cause of a small impact that shifts zero without you noticing right away.
- On the firing line, use a rest or a rack rather than leaning the gun unstably against a wall or table: a fall from a meter’s height is more than enough to damage a lens or shift a mount.
- During transport in a backpack or soft case, make sure the optic doesn’t rub against other hard objects (magazines, tools, ammo boxes) stored in the same spot.
- For air travel, check the carrier’s specific rules regarding guns and their accessories, and always favor an approved case that effectively protects the optic from handling in the hold.
Removable protective caps, often neglected once the optic is mounted on the gun, play a simple but effective role: they prevent an object from striking the glass directly during transport or extended storage. Leaving them in place systematically outside of shooting sessions is a reflex that costs one second and prevents most accidental scratches.
Focus and parallax are part of the same rigor. On a magnified scope, the focus ring (and the parallax adjustment on models that have one) is an integral part of the actual accuracy achieved, even though it’s rarely associated with the idea of maintenance. A poor parallax setting creates an aiming error that has nothing to do with a mechanical fault in the gun or the optic.
Parallax is the apparent movement of the reticle relative to the target when the eye isn’t perfectly centered behind the eyepiece. On optics with a dedicated adjustment, adjusting this ring to the actual shooting distance eliminates this source of error, often invisible unless you specifically look for it.
- Readjust the parallax setting with every significant change in shooting distance, especially in precision disciplines where distances vary from one string to the next.
- Check that the focus ring turns smoothly, without binding: unusual resistance can signal a grain of sand or the start of fouling in the mechanism, to address before it worsens.
- Occasionally clean around these rings with a soft brush, since dust tends to accumulate in the grip grooves more than on the smooth body of the tube.
- Never force a ring that seems stuck: a seized zoom or parallax mechanism deserves a check by a repair shop rather than a forceful attempt to free it, which risks damaging the internal gearing.
The reticle sharpness adjustment itself (diopter ring near the eyepiece) also deserves the occasional check, particularly if several shooters share the same gun. This setting depends on each person’s eyesight, and a blurry-looking reticle isn’t always an optic defect: it can simply be a diopter ring left on the previous user’s setting.
Specific maintenance by optic type
Not all optics require exactly the same level of attention. The type of equipment influences how maintenance work is distributed.
A variable-magnification scope (used on precision rifles or in long-range shooting) combines several internal lenses and a mechanical zoom system. The zoom and focus mechanism deserves an occasional check: a ring becoming hard to turn can signal a grain of sand or the start of fouling in the mechanism, and should never be forced.
A red dot, mechanically simpler, concentrates most of its fragility on the electronics and battery. The glass itself, often a single front lens on reflex models, is quicker to clean but just as scratch-sensitive.
An Olympic sport aperture sight (rifle or precision pistol) has no magnifying glass or electronics, but remains a precision mechanical part. Maintenance is limited to cleaning the aperture and checking the tightness on its mount, without the waterproofing or battery concerns of electronic optics.
A red dot sight mounted on a gun used in dynamic shooting (disciplines like IPSC or Steel Challenge on cardboard or steel targets) generally takes more shocks and vibration than a precision scope used in a stable position. Checking the mount and zero becomes even more important there, given the frequency of transitions and abrupt movements during shooting.
Whatever the optic type, the principle stays the same: regular optical cleaning, periodic waterproofing checks, zero verification after transport, and rigorous power management where applicable.
Mistakes that damage an optic more than they protect it
Certain habits, widespread more from lack of information than deliberate negligence, end up damaging an optic you thought you were maintaining well.
- Cleaning the glass with any cloth or piece of clothing instead of a dedicated microfiber: the rough fibers of ordinary fabric scratch optical coatings even when rubbed gently.
- Using a gun cleaning product (solvent, degreaser) on the lenses or even the optic’s housing: some products attack the seals or the external coatings.
- Disassembling the housing of a waterproof optic yourself to “check the inside” or attempt a home repair, risking permanently compromising the original waterproofing.
- Storing a still-wet optic in a hermetically sealed case, thinking “it’ll dry on its own inside.”
- Neglecting a zero check after a flight or a long road trip, assuming the mount must have stayed stable.
- Leaving a red dot on continuously between sessions, even when the gun stays stored for several days in the case.
- Tightening rail-to-optic mount screws “by force” without a torque wrench, risking damaging the tube or warping the rail.
- Storing the gun and its optic in an environment with strong temperature swings (car in full sun, uninsulated garage) without protection or humidity control.
- Putting off replacing a visibly weak battery, thinking “it’ll last one more session,” risking a complete failure mid-competition.
Maintenance frequency based on your practice rhythm
An optic’s maintenance frequency depends directly on the rhythm and type of practice, just as with the gun itself. An occasional shooter and a regular competitor don’t have exactly the same needs.
For a shooter practicing once or twice a month, a quick lens cleaning after each session and a visual check of waterproofing and mount are usually enough. Zero deserves a check before any session that follows a transport, even a short one.
For a regular competitor stacking several outings a week, optic maintenance should systematically fit into the end-of-session routine, just like cleaning the gun. Checking a red dot’s battery deserves increased attention given the higher frequency of use.
A more thorough periodic deep check — an in-depth waterproofing inspection, checking the mount’s tightening torque, a full test of the spare battery — remains useful as a supplement, at a rhythm that can range from once a quarter for an intensive practitioner to once or twice a year for a more occasional shooter.
In all cases, checking zero after transport is never negotiable, whatever the practice rhythm. It’s the quickest check to perform and the one with the greatest direct impact on real accuracy in a shooting situation.
Tracking your optic’s maintenance over time
Maintaining an optic, like maintaining a gun, benefits from being tracked over time rather than managed from memory. How many sessions since the last battery change, when the last waterproofing check happened, whether the mount was recently retightened: these are things you quickly forget without noting them somewhere.
A club shooter managing several guns and several different optics quickly ends up confusing dates and maintenance histories if they keep no written record. This approximation can get costly the day a battery fails without warning or a zero shifts without anyone noticing in time.
Logging every check — cleaning done, waterproofing condition observed, last battery replacement, last zero check after transport — lets you spot useful trends: an optic that needs a zero check more often than before may signal a mount that needs revisiting or a seal that needs inspecting.
That’s exactly the kind of tracking a digital shooting log makes easy. With PewPewLife, every session can be logged with the equipment used, the optic mounted on the gun, and a note on the maintenance performed or the last zero check. Over time, this tracking turns a vague impression into a precise, searchable history, both for the gun and for the optic equipping it.
This level of rigor isn’t excessive for anyone who takes their practice seriously, whether as a regular hobby or in competition. The optic directly determines the accuracy of every shot, and it deserves the same methodical tracking as any other piece of shooting equipment.
FAQ
Q: What’s the difference between cleaning a scope and cleaning a red dot? A: The principle is the same — dust removed first, then a microfiber cloth and dedicated product — but the red dot adds vigilance around the battery and electrical contacts that a classic scope doesn’t have. Both share the same risk of scratching the optical coatings with a bad cleaning motion.
Q: Should you check zero even after a very short car trip? A: A short trip with the gun well secured in its case carries lower risk, but a few confirmation shots before an important session remain a cheap safeguard. It’s mainly after a long transport, a flight, or an impact that the check becomes essential.
Q: How long does a red dot’s battery really last? A: It varies enormously depending on the model, the brightness used, and the diode technology, so it’s better to refer to the manufacturer’s manual than a general figure. The most reliable approach remains regular visual checks and always keeping a spare battery in the range bag.
Q: Is an optic that’s fogged up inside permanently ruined? A: Not necessarily, but it’s a sign of lost waterproofing that deserves a check by a specialized repair shop or the manufacturer rather than a DIY teardown. Continuing to use it without a check exposes the internal components to progressive corrosion.
Q: Can you use a regular glass cleaning product on a shooting optic’s lenses? A: No, it’s better to reserve a product specific to optics, less likely to attack the multi-layer coatings and the surrounding seals. A regular household product can contain components too aggressive for this type of coated surface.
Q: How do you know if the rail-to-optic mount is starting to loosen? A: A common sign is a grouping that slightly worsens for no apparent reason, or a slight play noticeable when gently trying to move the optic by hand, with the gun unloaded. A periodic check of the tightening torque, ideally with a torque wrench, lets you anticipate this problem before it affects zero.