
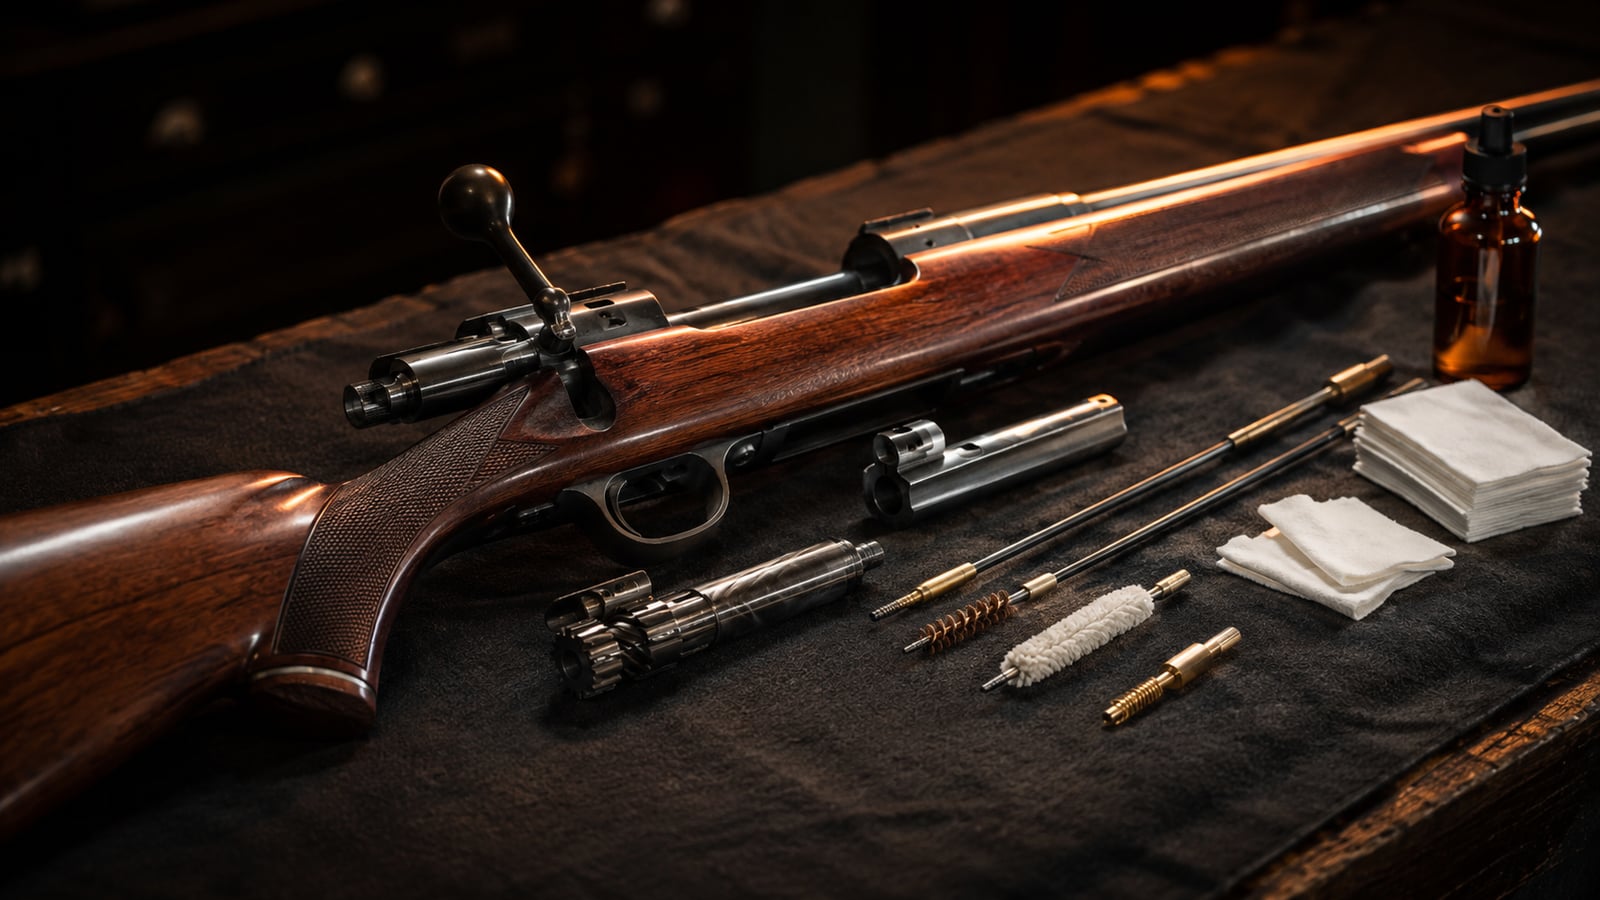
Why a bolt-action rifle deserves different maintenance
A bolt-action rifle doesn’t face the same stresses as a semi-auto. No gas system to clean, no moving bolt rails taking a beating with every shot: the mechanism is simple, rugged, and built to last decades if you look after it properly.
That very simplicity is exactly what leads a lot of shooters to neglect maintenance. A bolt-action rifle that still shoots straight after three seasons without a full clean gives you a false sense of reliability. The problem doesn’t show up in today’s group — it shows up in the barrel’s lifespan and in extraction reliability five or ten years down the line.
The barrel is the most sensitive part. Every shot deposits powder residue, bullet metal fouling (copper or lead depending on the ammo), and moisture in the rifling. Without regular cleaning, these deposits build up, promote corrosion, and gradually degrade accuracy, even on a quality firearm.
The bolt deserves the same attention, for different reasons. It’s a precision mechanical part that has to slide smoothly, lock up repeatably, and extract the case without effort. A grain of sand or a bit of hardened grease can be enough to cause a jam mid-match or mid-hunt.
This guide covers the whole procedure: partial disassembly, breech-to-muzzle bore cleaning (the method most gunsmiths prefer to protect the crown long-term), bolt and firing pin spring care, and the recommended frequency based on your actual usage. The goal is that you walk away with a clear routine, not a list of vague gestures.
Gear to gather before you start
A proper cleaning session starts with a tidy workspace. Set up on a clear, well-lit surface, with something to protect your work area (a cleaning mat or a thick old newspaper).
Here’s the minimum you’ll need:
- A rigid, one-piece cleaning rod in carbon or stainless steel, the right length for your barrel.
- A bore guide matched to your rifle’s caliber and action: the single most important accessory in the whole procedure.
- Bronze and nylon brushes in your firearm’s exact caliber.
- Cotton patches in the right size, in generous quantity.
- A copper-fouling solvent and an all-purpose solvent for powder residue.
- A fine gun oil or CLP for lubrication.
- A microfiber cloth, cotton swabs, and a small soft brush for hard-to-reach spots.
- Nitrile gloves if you’re sensitive to solvents.
The bore guide deserves a special mention because a lot of beginner shooters skip it, wrongly. Without one, the cleaning rod rubs directly against the chamber walls and the start of the rifling on every pass, gradually wearing that critical area. With a properly fitted bore guide, the rod stays perfectly centered and never touches the barrel’s metal.
Also check the condition of your cleaning rod itself before using it. A bent rod, or one whose coating is flaking, can mark the barrel on every pass — exactly what you’re trying to avoid. A good-quality carbon rod, even if a bit pricier, pays for itself over years of use.
Before touching a single cleaning tool, the rifle must be checked as empty. Open the bolt, remove the magazine if your model has one, and visually and manually confirm the chamber is truly empty.
Do this check at least twice, always, even if you’re certain the firearm is already empty. This reflex isn’t paranoia — it’s the foundation of all firearm handling, whether for maintenance or storage.
Keep the muzzle pointed in a safe direction at all times during handling, including while cleaning. A rifle being maintained is still a firearm, even with the bolt open and the magazine out: the muzzle-direction reflex never takes a break.
If you’re cleaning in a shared space (garage, family workshop), give the other occupants a heads-up and isolate the area for the duration of the procedure. Solvents give off fumes that kids and pets are better off not breathing, and a disassembled rifle on a table has no business being within reach of a curious visitor.
Partial disassembly, step by step
Partial disassembly of a bolt-action rifle generally comes down to removing the bolt from the receiver. That’s plenty for routine maintenance and for the vast majority of breech-to-muzzle bore cleanings.
Start by fully opening the bolt, pulling the handle back. On most modern bolt actions, a push button or a small lever near the receiver then releases the bolt so you can remove it completely from the action.
Locate this release mechanism carefully before forcing anything: every brand and model has its own method, and forcing it without having identified the right button risks damaging a part that isn’t designed to take stress in that direction. The manufacturer’s manual remains the most reliable reference if you’re new to this model.
Once the bolt is out, set it aside on your work surface, ideally on a clean cloth. This is the ideal moment to visually inspect the bolt face, extractor, and firing pin: look for traces of carbonized residue, hardened grease, or early corrosion.
Deeper disassembly of the bolt itself (removing the firing pin spring, fully stripping the firing pin) isn’t necessary for every routine cleaning. That deeper operation is reserved for a full annual clean or a specific intervention if you’ve identified a problem, and it’s worth doing with the manufacturer’s manual open next to you the first time.
For the barrel, no further disassembly is needed in the vast majority of cases: the opening left by removing the bolt is exactly what lets you clean from the breech, without ever touching the stock or the trigger system.
Why cleaning from the breech changes everything
Breech-to-muzzle cleaning — running the cleaning rod in through the chamber rather than through the muzzle — is the method recommended by nearly all gunsmiths and experienced precision shooters. The reason is purely mechanical.
The muzzle (the crown) is the last spot the bullet touches before leaving the firearm. The slightest imperfection right there, even one invisible to the naked eye, can disrupt bullet stabilization and measurably degrade accuracy on target.
When you clean from the front, the cleaning rod and its tip inevitably rub against this zone on every pass, even carefully. Repeat that motion hundreds of times over a rifle’s lifespan, and you eventually round off the rifling slightly at the muzzle — a phenomenon precision shooters sometimes call crown wear.
Cleaning from the breech avoids this problem entirely: the rod enters through the chamber, guided by the bore guide, and only meets the crown on its way out, in the same direction the bullet itself already travels. Wear induced by cleaning then follows the same logic as natural firing wear, instead of working against it.
If your rifle’s configuration makes breech cleaning difficult (some models with an integral fixed magazine complicate access), a bore guide suited to muzzle insertion remains an acceptable fallback. The key is to always use a bore guide, whichever direction you clean from.
The bore cleaning procedure
Fit the appropriate bore guide into the chamber with the bolt removed. Check that it’s properly seated and centers the rod correctly before starting any pass.
Soak a first patch in copper-fouling solvent and run it through the bore once, from chamber to muzzle, without going back and forth with the same patch inside the barrel. Change patches on every pass rather than pushing an already-dirty patch back and forth.
Let the solvent work for a few minutes, giving it time to dissolve the copper and powder residue built up in the rifling. This downtime is a good moment to work on the bolt — see further down in this article.
Then run the bronze brush, soaked in solvent, always in the same direction, chamber to muzzle. Push it all the way through before pulling it back out the same side, rather than reversing it partway, which would damage the bronze bristles against the rifling.
Repeat the solvent-then-brush cycle two or three times depending on the bore’s condition, watching the color of the patches each time. A strong blue-green tint indicates copper still present and being dissolved; a progressively lighter tint means you’re getting close to a clean bore.
Finish with dry patches, always in the same direction, until they come out perfectly clean, with no trace of solvent or residue. A truly clean bore produces a dry patch that comes out white, with no coloring at all.
Once the bore is clean and dry, run one last patch lightly soaked in fine oil to leave a protective film against corrosion. Keep that film light: a dripping barrel adds nothing over a lightly oiled one, and only attracts more dust in storage.
Bolt and firing pin spring maintenance
The bolt of a bolt-action rifle is a mechanical part that endures a simple but repeated cycle: closing, locking, firing, opening, extracting. Each of these steps depends on clean, properly lubricated surfaces.
Start by wiping down the whole bolt with a dry cloth to remove dust and visible residue. Then use a patch soaked in all-purpose solvent on the bolt face, where carbonized powder residue tends to build up after every shot.
The extractor deserves particular attention: it’s a small part that needs to keep its tension and freedom of movement to properly grip the case rim on every cycle. A wooden toothpick or a cotton swab lets you clear residue lodged in its recess without risking deforming it with a metal tool.
The firing pin slides inside the bolt and is worth inspecting to make sure there’s no hardened grease or residue slowing its travel. A firing pin that slides too slowly because of old, excess grease can cause light strikes — a frustrating problem to diagnose if you don’t think of this cause.
As for the firing pin spring itself, full removal isn’t necessary for every routine cleaning. A superficial clean of the assembled bolt, with a visual check that it slides properly, is enough in the vast majority of cases. Full disassembly of the spring is reserved for a more thorough annual service or diagnosing a specific problem (weak strikes, repeated light strikes), always with the manufacturer’s manual in front of you.
For lubrication, a thin coat of oil on the bolt body and sliding surfaces is plenty. Absolutely avoid drowning the firing mechanism in oil: excess lubricant thickens over time, especially in cold weather, and can also slow the firing pin’s travel at the worst possible moment.
Reassembly and function check
Once the barrel and bolt are clean and lightly lubricated, put the bolt back in, respecting the original insertion direction. Slide it gently until you feel the release mechanism you used for removal click naturally back into place.
Close the bolt and check that lockup happens normally, with no hard spot or unusual resistance. An unusual hard spot at this stage usually points to a poorly wiped cleaning residue or excess grease rather than a real mechanical problem, but it’s worth reopening and checking before going further.
Then run a few dry cycles, with the rifle unloaded and pointed in a safe direction: opening, closing, working the trigger in a controlled position. This test lets you confirm everything runs smoothly before heading back to the range or putting the rifle away.
Use this moment to also check the firearm’s overall condition beyond just the mechanism: play between the stock and the receiver, the optic’s mounting if you have one, and the cleanliness of the scope and its rings. A thorough maintenance session covers the whole rifle, not just the barrel and bolt.
Finally, store your rifle under good conditions: away from moisture, in a breathable case rather than a fully sealed sleeve that could trap residual humidity against the barrel. Storage itself is just as much a part of the firearm’s lifespan as cleaning is.
The stock also deserves clean maintenance of its own, separate from the barrel and bolt, and that maintenance differs depending on the material. A traditional wood stock and a composite stock don’t have the same needs or the same vulnerabilities.
On a wood stock, regularly check the condition of the protective varnish or finishing oil. Wood that dries out, or varnish that starts flaking, becomes more sensitive to humidity swings, which can eventually warp the stock slightly and affect the repeatability of contact between the barrel and forend — a sensitive point in precision disciplines.
Simple upkeep consists of applying, once or twice a year depending on storage conditions, a thin coat of linseed oil or a wood-care product specifically made for gun stocks. Pay a bit more attention to the most-handled areas, like the grip zone, which lose their protection faster than the rest of the stock.
On a composite or polymer stock, maintenance is simpler: wiping with a slightly damp cloth is usually enough to remove dust and fingerprints. Still, avoid harsh petroleum-based solvents on these materials, since some polymers can become brittle or discolor with repeated contact with unsuitable products.
Also check, regardless of material, the contact points between the stock and the action: play that develops over time directly degrades shot consistency. Action screws in particular deserve periodic torque checks with a torque wrench if you own one, since uneven tightening from one screw to the next can also affect accuracy.
For rifles mounted on an aluminum or advanced-composite chassis (stock), often used in long-range precision disciplines, maintenance is generally limited to exterior cleaning and a check of the mounting points, with no special treatment for the material itself, which isn’t affected by moisture or thermal swings the same way traditional wood is.
Cleaning frequency based on your use
The question that comes up most often among shooters, especially beginners, is about the ideal cleaning frequency. The answer depends directly on volume fired and type of use — there’s no single rule that works for everyone.
For a recreational shooter putting a few dozen rounds through the gun each month at an affiliated club, a full clean after every range session remains the safest practice, even if a lighter clean (bore only) can be enough between two closely spaced sessions if the volume fired was low.
For a precision shooter running long strings in 300m rifle or bench rest disciplines, bore cleaning becomes more frequent, sometimes every few dozen rounds within the same intensive training session. Copper buildup degrades accuracy faster in this sustained-fire context than in occasional use.
For a hunter using their category-C bolt-action rifle a few days a year, a full clean before the season and another right after are generally enough, as long as the firearm is properly dried and oiled before a long winter storage period.
An experienced instructor often sums up the rule this way: always clean after a session in the rain or high humidity, even if you’ve only fired a handful of rounds, because it’s moisture that accelerates corrosion far more than the mere buildup of dry-fire residue.
Beyond regular cleaning, plan for a more thorough service once or twice a year depending on your practice volume: a deeper inspection of the bolt, checking the firing pin spring, and checking stock play and optic mounting. This periodic review lets you catch emerging wear before it becomes a real problem on the firing line.
Not every range trip warrants a full clean with bolt removal and complete bore cleaning, either. When two sessions are close together in time and the volume fired stays modest, a lighter clean saves time without compromising the firearm’s reliability: one or two solvent patches in the bore followed by dry patches, without necessarily removing the bolt entirely or doing a full copper-fouling treatment.
A quick wipe of the bolt and its recess, without disassembly, usefully rounds out this lighter clean. Just check for the absence of visible residue and the general lubrication state, adding a trace of oil if the surfaces seem dry. This kind of intermediate maintenance works particularly well during stretches when you’re stacking up several club sessions in the same week, for example during intensive prep before a competition.
The important thing is not to turn this into a permanent habit that indefinitely replaces full maintenance: always schedule a complete clean at least once every few sessions, even during periods of intensive practice. And whatever level of maintenance you choose, full or light, the firearm must always be checked empty before any handling, with no exceptions.
Common mistakes to avoid
The first, very common mistake is cleaning only from the muzzle out of habit or convenience, without a bore guide. That’s exactly the motion that gradually wears the crown and degrades accuracy over the long run, even if the effect isn’t immediately visible.
The second mistake is over-lubricating the bolt, thinking you’re doing the right thing. Excess oil doesn’t improve anything past a certain point and instead ends up attracting dust and thickening over time, especially in cold weather.
The third mistake is neglecting maintenance entirely because the rifle “still shoots straight.” Today’s group tells you nothing about the barrel’s internal condition or the bolt’s progressive wear: it’s a misleading indicator for judging maintenance needs.
The fourth mistake, common among beginners, is forcing the bolt’s release mechanism without having precisely identified how it works on that particular model. Every brand has its quirks, and forcing a part in the wrong direction can deform or break it.
The fifth mistake is putting the rifle away immediately after cleaning, without letting the solvent fully evaporate or checking that no residual moisture remains in the bore. A closed case over a barrel still slightly damp with solvent promotes exactly the corrosion you’re trying to avoid.
Finally, one last mistake is using brushes or patches of the wrong caliber, too tight or, conversely, too loose. A poorly fitted brush doesn’t clean the rifling effectively and can, in some cases, even leave fibers stuck in the bore that then need to be removed with an extra patch.
Beyond these technique mistakes, regular maintenance is also the best time to spot emerging wear before it turns into a failure on the firing line. On the barrel, watch for corrosion pitting, even minor, especially near the chamber or on the first inches of rifling: an isolated pit usually points to a drying issue after a previous clean or storage that was too humid.
On the bolt, watch the wear on the locking surfaces. Excessive polish or unusual marks there deserve a licensed gunsmith’s opinion, since these surfaces absorb most of the stress with every shot. The firing pin spring deserves the same ongoing vigilance: a strike that seems progressively less firm, or occasional light strikes with no obvious ammunition cause, warrant a more thorough check, generally by a gunsmith if you’re not comfortable with this level of disassembly.
The extractor is one last part to keep an eye on over time. Extraction that becomes occasionally hesitant, with a case sometimes staying stuck in the chamber instead of being ejected cleanly, often points to a worn extractor or a weakened extractor spring. It’s a relatively simple and inexpensive part to replace at a gunsmith, but it’s better to act on the first signs rather than wait for an annoying jam mid-match. A simple test worth building into every full maintenance session is also checking the longitudinal and lateral play of the closed bolt in the receiver: play that gradually increases compared to what you knew from your rifle when new can signal general wear in the locking system, worth having confirmed by a professional.
Choosing the right solvent for the type of fouling
Not all cleaning solvents target the same type of deposit, and confusing the two main families wastes a considerable amount of time without getting a truly clean bore. Understanding this distinction completely changes how effective your procedure is.
So-called all-purpose solvents mainly target burnt powder residue and the carbon deposits that form with every shot. They work quickly, often within a few minutes of contact, and suit routine maintenance after a normal range session.
Copper-fouling solvents, on the other hand, specifically target the micro-deposits of copper left by bullet jackets in the barrel’s rifling. This copper fouling builds up more slowly, but it degrades accuracy in a more insidious way than simple powder residue: even a thin layer of copper in the rifling slightly changes how the bullet is stabilized.
A classic sign of significant copper fouling shows up directly on the patches: a strong blue-green tint that persists despite several successive passes indicates a bore that deserves a more thorough copper-fouling treatment, beyond routine cleaning. In that case, let the copper-fouling solvent work longer, even if it means repeating the process over several sessions rather than forcing a full copper removal in one go with a very aggressive product.
Some solvents combine both functions in a single product, which simplifies logistics for routine maintenance, but a shooter dealing with stubborn copper fouling will do well to keep both product families separate in their cleaning kit. The combined product suits routine maintenance; the dedicated copper solvent comes in occasionally once the patches confirm the need.
Always check the solvent’s compatibility with your rifle’s materials before using it for the first time, especially if your firearm has polymer parts or specific stock finishes. Most routine maintenance solvents are safe on these materials, but a highly concentrated product meant only for metal can damage certain finishes if it stays in prolonged contact with them.
Always store your solvents in properly labeled containers, out of children’s reach, and in a ventilated space. Many of these products are flammable and give off fumes that are better not breathed in for extended periods, which is why working in a ventilated space rather than a closed room makes sense.
Special case: scoped rifles and optic maintenance
Most modern bolt-action rifles come equipped with a riflescope, which adds a dimension to the firearm’s overall maintenance. The optic itself should never be cleaned with the same solvents as the barrel, or you risk damaging the lens coatings.
Use only a dedicated microfiber cloth and, if needed, a specific optics cleaning solution — never a petroleum-based solvent, which could attack the anti-reflective coatings. An air blower lets you remove dust before any contact with the cloth, avoiding scratching the lens with an abrasive particle.
Use every full rifle maintenance session to also check the scope’s attachment on its mounting rings. Play that develops gradually can explain a point-of-impact shift that many shooters wrongly blame on the barrel or the ammunition, when the problem simply comes from a mounting screw that’s loosened slightly from repeated firing vibration.
Also check the condition of the front and rear flip caps if your scope has them, along with the cleanliness of the parallax and magnification adjustments. An adjustment ring gummed up with dust or excess old grease can make adjustments during a match much harder than they should be.
Logging your maintenance so nothing slips
Effective maintenance relies as much on method as on regularity, and regularity is easily lost when it depends solely on memory. Many shooters know they “should” clean more often, without ever knowing exactly how many rounds have gone through since their last full clean.
Noting, after every session, the number of rounds fired, the type of cleaning done (full or light), and the conditions encountered (rain, dust, extreme heat) builds up a reliable history over time. That history lets you notice, for instance, that a recurring jam always shows up around the same round count since the last full clean — a useful signal for adjusting your frequency.
That’s exactly what PewPewLife, the digital shooting log for sport shooters enables: every logged session includes the volume fired, and it becomes easy to cross-reference that history with your maintenance dates. Rather than relying on an impression (“it’s been a while since I cleaned it”), you have an exact number.
Over time, this history also helps you refine your own frequency rule, more precisely than the general benchmarks given earlier in this article. A shooter who notices, through their log, that they mostly shoot dry indoors and rarely in the rain can reasonably space out their full cleans a bit more than a shooter who goes out in all weather.
This regularity also comes down to a well-thought-out cleaning kit, which naturally evolves across seasons beyond the few basic accessories. It’s worth structuring it correctly from the start rather than buying pieces one at a time that end up unnecessarily duplicated.
A well-organized kit generally splits into three logical compartments: consumables (patches, solvents, oil), reusable tools (rods, brushes, bore guide), and inspection accessories (magnifying glass, chamber inspection mirror, toothpicks). This separation makes prepping before a session and putting things away afterward much easier.
Plan for several sets of brushes if you shoot several different calibers: a brush used on the wrong caliber, even a close one, doesn’t clean properly and can damage the rifling through ill-fitting contact. Clearly labeling each brush with its caliber avoids mix-ups, especially if several members of the household share the same cleaning gear.
Regularly replace consumables rather than using an expired solvent or an oil that’s lost its properties over time. A solvent that’s too old loses copper-removing effectiveness, and an oil that’s started oxidizing in its bottle protects less well against corrosion than a fresh product.
For shooters who practice several disciplines with different firearms (50m rifle, 300m rifle, category-C hunting rifle), a well-stocked shared kit avoids duplicating purchases needlessly. Only the brushes and bore guides specific to each caliber need to be duplicated; solvents, oils, and cloths can be shared across all your firearms without issue.
Finally, always keep a minimal reserve of patches and solvent in your range bag rather than only at home. A quick clean right after a session in the rain or in dusty conditions, even before you get home, can make a real difference to the barrel’s condition if the trip back is a long one.
FAQ
Q: Do I need to fully strip the firing pin spring every time I clean? A: No, a superficial clean of the assembled bolt is enough for routine maintenance. Full disassembly of the spring is reserved for a more thorough annual service or diagnosing a specific problem, with the manufacturer’s manual in front of you.
Q: Why clean from the breech rather than from the muzzle? A: The muzzle (the crown) is the most sensitive area for accuracy, and the repeated rubbing of a cleaning rod there eventually wears it. Cleaning through the chamber, with a bore guide, protects this critical area over the firearm’s lifespan.
Q: How often should a recreational bolt-action rifle be cleaned? A: It varies depending on volume fired and conditions encountered, but cleaning after every club session remains the safest practice. A session in the rain or high humidity warrants a clean even if few rounds were fired.
Q: Is a bore guide really essential? A: Yes, it’s the accessory that most effectively protects the chamber and the first inches of rifling against the wear caused by cleaning itself. Without it, the rod rubs directly against the metal on every pass.
Q: How do I know if my bolt needs more thorough maintenance than a simple surface clean? A: Signs like less smooth sliding, repeated light strikes, or hesitant extraction indicate that a more thorough service is needed. In that case, it’s better to consult a licensed gunsmith or the manufacturer’s manual rather than disassembling at random.
Q: Does optic maintenance follow the same frequency as the barrel and bolt? A: Not necessarily: lenses mainly need cleaning based on their exposure to dust and splashes, and benefit from a microfiber cloth rather than a solvent. Use every full maintenance session on the firearm to also check the scope’s attachment on its mounting rings, though.