
Why dry fire really changes your practice
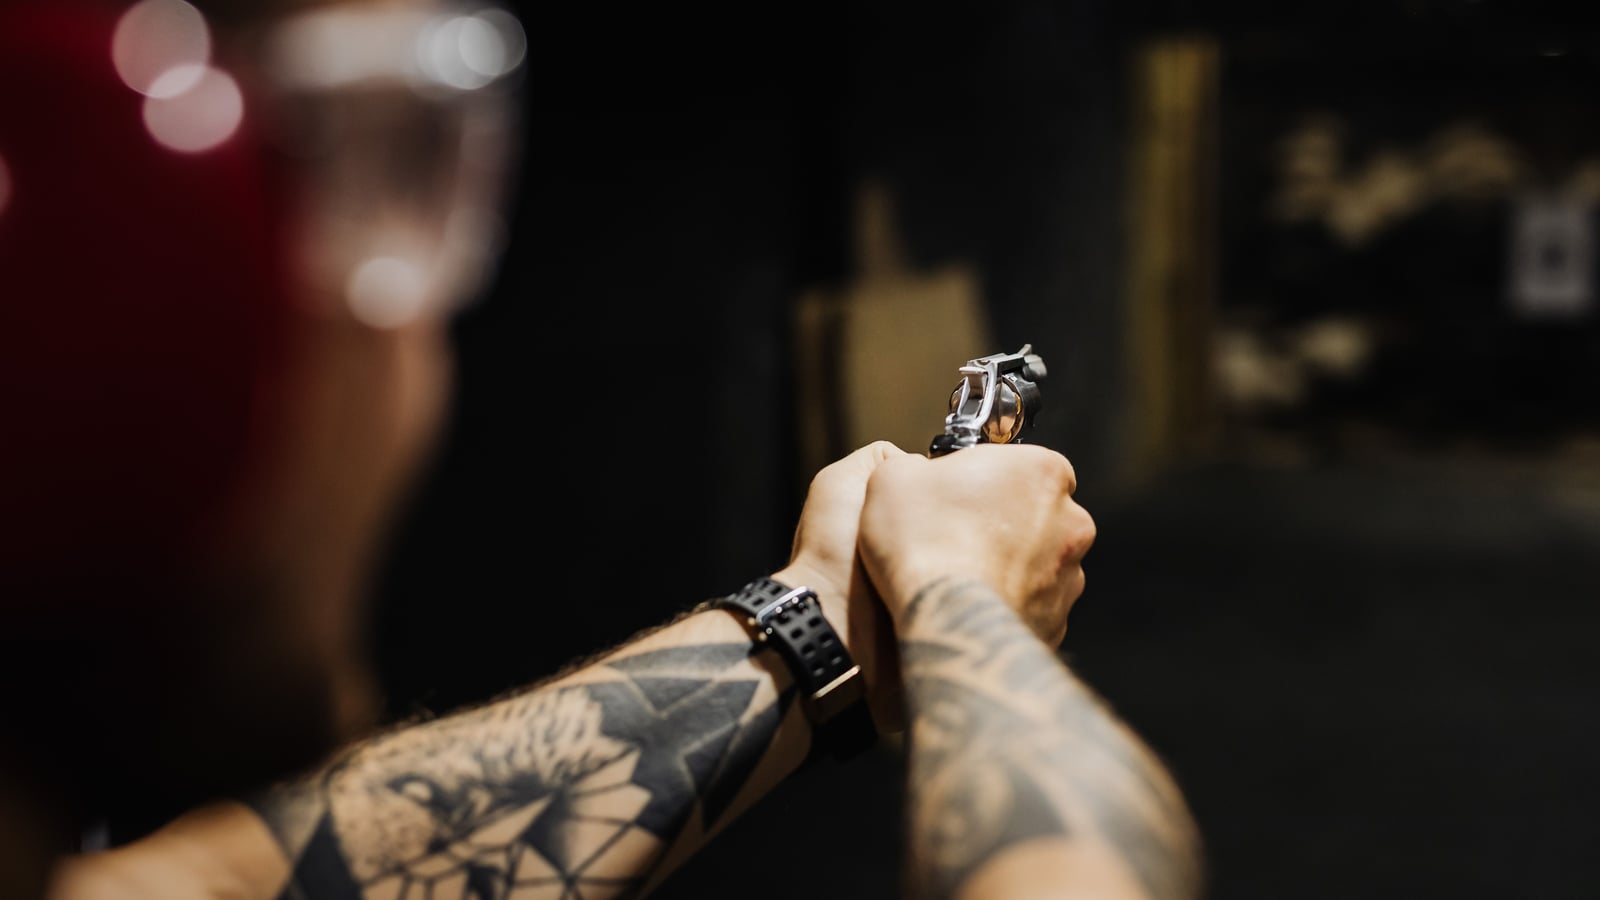
Dry fire means repeating the complete shooting motion without ammunition and without a discharge: aiming, managing the trigger, returning to position, without a single projectile ever leaving the gun. It sounds too simple to be useful, and yet it’s one of the most underused tools among club shooters.
The reason is mechanical. At the range, a 50-round session rarely involves more than 20 minutes of actual gun handling — the rest of the time is lost changing targets, reloading magazines, waiting between turns. In dry fire, every minute counts because there’s no reloading, no ammo management, no range constraints.
An experienced club shooter who practices dry fire regularly often reports a noticeably crisper trigger feel from the very first live rounds afterward. That’s no surprise: the trigger motion is a motor skill, and motor skills are built through repetition, not one-off intensity.
This program is designed for 15 minutes a day, no more. That’s deliberately short: the quality of attention during the exercise matters far more than its length. Fifteen focused minutes beat 45 distracted ones where bad habits repeat without correction.
Before going further, a clarification on vocabulary: in this article, “trigger” always refers to the trigger blade, the piece the finger operates. The internal mechanism that releases the striker is never involved in the exercises described here — only the trigger blade is handled by the shooter.
What dry fire concretely delivers is a decoupling between motor learning and the stress of the shot breaking. At the range, every round costs money, produces noise and recoil, and occupies infrastructure shared with other shooters. Dry, none of these constraints exist, which allows the same micro-movement to be repeated dozens of times in a row with zero outside pressure.
This program doesn’t claim to replace club sessions or an instructor’s supervision. Its goal is more modest and more realistic: turning the 15 minutes many shooters spend fiddling with their gun in front of the TV anyway into structured work, with a clear weekly goal instead of aimless handling.
The point of the 4-week structure rather than a free-form program is simple: it prevents jumping straight to the most rewarding exercises (speed, transitions) before the fundamentals are consolidated. A shooter in a hurry who skips week 1 to go straight to transition work builds speed on an unstable sight picture, which caps their progress far sooner than they think.
Absolute safety: the non-negotiable foundation
No dry fire exercise begins without a physical and visual check that the gun is completely unloaded. Chamber open, magazine removed, visual AND tactile check of the empty chamber, in that order, every time, no exceptions, no shortcuts.
This check isn’t a symbolic ritual — it’s the one thing that separates serious training from a household accident. A shooter who skips this step because they’re “sure” they already cleared the gun earlier that day is taking a risk that no technical progress justifies.
The training area must be set up so that no ammunition is ever present there. That means: no box of cartridges on the nearby table, no loaded magazine “just in case” in a nearby drawer, no ammunition in the same room if possible. Zero risk only exists by physically eliminating any possibility of confusion.
The choice of aiming direction matters just as much. Even a gun verified as unloaded must always point in a safe direction: a load-bearing wall with no living space behind it, never toward a window, door, or walkway. The four safety principles of firearm handling apply at all times, including dry.
An often-forgotten point: set up your dry fire area to be reproducible. Always using the same wall, the same distance, the same fake target taped to the wall helps standardize visual reference points from one session to the next, which speeds progress by removing an unnecessary variable.
Finally, if any doubt exists about the state of the gun at any point during the session, the exercise stops and the check starts completely over from the beginning. This is never a waste of time — it’s the condition that makes everything else possible.
A complementary principle concerns the temporal isolation of dry practice. Many clubs and instructors recommend never mixing, within the same session, handling a gun unloaded for training purposes with handling a gun loaded for live fire. Simply changing rooms, or at minimum fully putting away ammunition before starting, creates a clear mental boundary between the two activities.
It’s also recommended to inform other people present in the home that a dry fire session is underway, especially if the training area isn’t a separate closed room. This isn’t excessive caution: it prevents someone from unknowingly stepping into the fictional line of fire during the exercise.
Finally, a shooter who feels fatigue, irritation, or a drop in concentration should stop the session rather than push through it. Safety relies on constant attention, and attention degraded by fatigue is exactly the ground on which handling errors happen, even in a dry-fire setting.
The minimal gear to get started
Dry fire requires almost no equipment, making it a tool accessible to any licensed shooter, whatever their budget or club affiliation. The essentials come down to three simple items.
A fake target fixed to the wall at a realistic height is enough for most exercises. Some shooters use a simple sheet of paper with a drawn aim point, others prefer a miniature reproduction of a club target to keep the same visual references as in live sessions.
A stopwatch or a timer app on a smartphone becomes indispensable once the program covers transition exercises and draw or mount speed from a holster or shoulder. The timer’s precision matters less than how consistently it’s used, session after session.
A logbook, paper or digital, lets you note sensations, points worked on, and difficulties encountered at each session. This is often what separates a shooter who’s genuinely improving from one who repeats the same 15 minutes without ever adjusting their work.
For shooters practicing pistol draws from a holster, a holster identical to the one used in competition or at the club is recommended, so the motion trained dry transfers directly to the live motion. A different holster would introduce a variable that undoes part of the training’s benefit.
Some optional accessories exist, such as dummy rounds (non-firing, clearly visually identifiable), which allow practicing loading and magazine handling with zero risk, but they aren’t essential to follow this program.
Lighting in the training area also deserves some attention, especially for disciplines using a red dot or a fine sight. Light that’s too weak or too contrasted compared to usual range conditions can distort perception of alignment, which limits skill transfer to live practice. Reproducing lighting close to that of your usual range, when possible, improves training consistency.
For shooters using a scope or a red dot, checking that the optic remains aligned and functional before each cycle of sessions avoids building sight work on a miscalibrated setting. A weak battery in a red dot, for example, can create the impression of a less crisp dot that has nothing to do with the shooter’s technique.
Finally, a simple mirror placed facing the training area lets you periodically check your overall posture (shoulder alignment, foot position, torso lean) without needing a partner or instructor at every session. It’s not a replacement for an instructor’s outside eye, but a useful complement between club sessions.
Week 1: building the foundations of sight alignment
The first week focuses exclusively on aligning the sights or the red dot, with zero speed pressure. The goal is to rebuild an eye that knows exactly where to look and for how long before each shot.
Day after day, the base exercise stays identical: gun verified unloaded, stable shooting stance, front sight aligned in the rear sight notch (or the red dot in the sight window), holding that alignment for 5 to 8 seconds without moving, then fully releasing.
A useful variant this week is closing your eyes, taking your natural aiming stance, then opening your eyes to check where the gun is pointing. This immediately reveals the gap between the body’s “natural” position and the position actually aimed at, a discrepancy many shooters ignore until they’ve done this test.
Across the 15 daily minutes of this first week, the recommended split is: 5 minutes of safety check and setup, 8 minutes of repeated static alignment, 2 minutes of winding down and logging in the notebook.
By the end of the week, a shooter who has followed this work seriously generally notices better stability in their sight alignment from the very first seconds of taking a stance, without extra concentration effort. That’s the sign the motion is starting to become automatic rather than deliberate.
A complementary exercise, reserved for the last sessions of week 1, is working on regaining sight alignment after a deliberate loss of it. The shooter looks away for a second, then comes back to find alignment as quickly as possible without excessive rush. This exercise gently prepares the ground for the transitions worked on in week 4, without yet introducing speed pressure.
It’s also useful, at the end of week 1, to note in the logbook any asymmetries spotted: a dominant eye that tires faster than the other, a shoulder that tends to droop after several repetitions, or a foot position that drifts slightly from one attempt to the next. These seemingly minor observations become valuable watch points for the following weeks.
One last thing worth flagging for this first week: the urge to “feel” immediate progress is strong, but pure alignment work is often perceived as monotonous. It’s exactly that monotony that builds the solidity of the motion; wanting to cut it short to move faster to more stimulating exercises is the most common mistake at this stage of the program.
Week 2: isolated trigger work
The second week introduces the trigger motion itself, always without breaking the sight alignment built the previous week. This is where the majority of progress in pure precision happens.
The central exercise is sometimes called the “coin test”: placing a coin or a small flat object on the barrel or sight rail, then pulling the trigger through its full travel without dropping the object. If the object falls, it signals an unwanted wrist movement at the moment the shot breaks.
The work is done by pressing the trigger continuously and progressively, without a jerk, up to the break point, which ideally should surprise the shooter themself. This “surprise break” is the central concept of the whole week: anticipating the exact moment of the break systematically triggers recoil anticipation, even dry.
A complementary exercise is working on the trigger “reset,” meaning the partial release that lets you find the contact point again without fully letting go of the trigger blade. This motion, once automated, speeds up real-world rate of fire without sacrificing precision.
The split of the 15 minutes this week shifts toward more active repetitions: 3 minutes of safety and setup, 10 minutes of pure trigger work (alignment then break), 2 minutes of written review. Quality always trumps the number of repetitions.
One technical point deserves detail this week: finger position on the trigger blade directly influences how straight the pressure applied is. A finger positioned too deep, at the first joint, tends to pull the trigger slightly off-axis, which deflects the gun sideways at the break. Positioning at the fingertip or first knuckle, depending on each person’s build, generally gives a more linear pressure.
It’s useful, during this week, to also work the trigger in a degraded position, particularly with a slightly fatigued arm after several repetitions. This lets you verify the trigger motion stays clean even as overall arm stability starts to decline, a situation common toward the end of a match or a long live session.
A useful exercise to objectify this week’s work is asking an experienced club shooter to watch, at close range, the barrel or red dot during the dry trigger break. An outside eye often spots an unwanted movement the shooter themself doesn’t perceive, so much does the motion already feel mastered from the inside.
You also have to accept that this week is the most frustrating in the program for many shooters, because progress isn’t always immediately visible to the naked eye. The feeling of a “surprise” break sometimes takes several sessions to settle in, and that’s normal: the brain has to unlearn an anticipation reflex that, for some, has been ingrained since their very first shooting sessions.
Week 3: combining sight alignment, trigger, and breathing
Starting in the third week, the two previous skills combine with a third element too often neglected by beginners: breath control. Poorly managed breathing moves the gun invisibly to the naked eye but very really on the final group.
The reference exercise is to inhale normally, exhale halfway, then hold a breathing pause for a few seconds during which the sight alignment stabilizes and the trigger blade is operated. This sequence, repeated dry, becomes an automatic habit that no longer requires conscious thought after a few weeks.
A useful exercise this week is progressively extending the sight-hold time before the shot, from 3 seconds early in the week to 10 seconds by the end, to accustom the body to staying stable without tensing up even as the wait lengthens.
It’s also useful to introduce controlled variability here: slightly changing the starting position (standing, supported, kneeling depending on the discipline) to verify the sight-trigger-breathing combination stays reliable regardless of the exact posture.
The split of the 15 minutes balances out as follows: 3 minutes of safety, 4 minutes of isolated breathing work, 6 minutes of the full combined motion, 2 minutes of review. This week requires more mental concentration than the previous ones, which justifies not exceeding the planned duration.
An often underestimated aspect of this week concerns heart rate, distinct from breathing but directly influencing it. After recent physical exertion (climbing stairs, a rushed trip to the training area), the pulse stays elevated for several minutes and disrupts sight stability far more than poorly managed breathing alone would. Planning one or two minutes of calm before starting the session noticeably improves the quality of the work.
Some shooters benefit from introducing, during this week, a slight artificial mental load to get closer to real-competition stress conditions: mentally counting down during the exercise, or imposing a strict time limit before the aiming “go.” This addition remains optional and should only be introduced once the week’s basic exercises are already flowing smoothly.
One last point for this week 3: the sight-trigger-breathing combination should never be forced if one of the three components isn’t yet stable individually. A shooter still struggling with the pure alignment of week 1 will benefit from postponing this week 3 rather than stacking a new difficulty onto a still-fragile foundation.
Week 4: transitions and situational drills
The final week of the program introduces the concept of transitions: moving from one fictional target to another, managing a position change, or chaining several repetitions of the full motion without losing execution quality.
For disciplines involving several cardboard or metal targets (never human-shaped), the exercise consists of placing two or three fictional aim points on the training wall and working the movement of the eyes then the gun from one to the other, marking a full alignment time each time before operating the trigger blade.
The stopwatch comes into play here, not to chase speed at all costs, but to objectify real progress. A shooter who logs their transition time each week can observe, over several months, a gradual reduction without ever having sacrificed alignment precision for speed.
For rifle shooters, transitions are worked differently: resuming the mount after a pause, position stability after a slight lateral shift, or managing postural fatigue toward the end of the exercise. The principle stays identical: isolate a transition skill and repeat it until it becomes fluid.
The last session of this week 4 ideally serves as an overall review: revisiting an exercise from each of the three previous weeks (pure sight alignment, isolated trigger, combined breathing) to verify nothing was forgotten along the way, before considering a new 4-week cycle with more ambitious goals.
For disciplines involving movement between two shooting positions, week 4 can also incorporate balance-management work during the fictional movement, marking a clean, stable stop before resuming sight alignment. This kind of exercise particularly benefits shooters practicing disciplines with several successive shooting stations.
A useful exercise to close out this week is chaining five complete repetitions of the motion (aim, breathe, trigger, reset) with no pause between them, maintaining the same execution quality throughout the whole series. If the fifth repetition is noticeably less clean than the first, it signals a lack of concentration endurance worth working on during the next cycle.
It’s important to remember, at this point in the program, that transition speed should never become a goal in itself detached from precision. A shooter who improves in pure speed but whose alignment degrades under live conditions has actually regressed, even if their stopwatch shows better times than at the start of the cycle.
How to concretely structure your 15 minutes each day
A program is only as good as how consistently it’s executed, and 15 minutes a day rarely hold up without a minimum of structure around them. The first recommendation is to set the same time slot every day, before or after another already established habit, so the session becomes automatic rather than mentally negotiated each time.
A simple, robust breakdown for each session: 2 minutes of non-negotiable safety checking, 10 minutes of that day’s technical exercise according to the program week, 3 minutes of logging in the notebook. This breakdown stays valid across all four weeks; only the content of the middle 10 minutes changes.
Missing a day occasionally has no real impact on overall progress. A dropout of several consecutive days, on the other hand, breaks the motor automaticity being built and often forces you to redo part of the previous week’s work. An 8-minute session rushed for lack of time beats a session skipped entirely.
Some shooters prefer splitting the 15 minutes into two moments in the day rather than one continuous block, particularly during weeks of isolated trigger work where the required concentration is intense. Both approaches work, provided you stay consistent from one day to the next.
Using a digital shooting log app to record dry fire sessions, on the same footing as live sessions, helps visualize consistency over time and spot slack periods before they become a problem.
The environment around the session also affects its quality. Turning off phone notifications, telling people around you that you won’t be available for fifteen minutes, or simply closing the door of the room, are simple gestures that noticeably increase the concentration actually available for the exercise. A shooter distracted by a notification in the middle of an isolated trigger exercise loses a good part of the repetition’s benefit.
Some shooters prefer to associate each program week with a written goal posted near the training area, for example a simple sentence like “this week: surprise break, no wrist tension.” This visual reminder, even minimal, helps keep focus on the week’s precise goal rather than drifting toward easier or more rewarding exercises.
Finally, the structure proposed here (2 minutes of safety, 10 minutes of exercise, 3 minutes of review) remains a starting framework, not a rigid constraint. A shooter who needs 4 minutes for a particularly thorough setup, or who prefers logging their review the next morning with a clear head, can adjust this breakdown as long as the general spirit of the session (safety first, focused exercise, written record) is respected.
The most common mistakes in dry fire
The first mistake, and the most dangerous, is neglecting the safety check because “it’s just a dry exercise.” This progressive negligence is exactly the mechanism that turns safe training into a preventable accident, and it must be actively fought from the very first week.
The second common mistake is wanting to go too fast, particularly as early as week 2, by trying to speed up the trigger motion before sight alignment is stable. The result is a low-quality automaticity, harder to correct afterward than a simple delay in progress.
A third mistake is neglecting the logbook, considering dry fire “just practice” that doesn’t deserve to be logged. Without a written record, it becomes impossible to distinguish real progress from a mere subjective impression, which severely limits the program’s value over time.
Some shooters also practice without ever varying the exercises, mechanically repeating the same motion with no connection to the program week or their own identified weaknesses. Dry fire benefits from a progressive structure, not endless fixed repetition.
Finally, a subtler mistake concerns mental posture during the exercise: practicing distractedly, phone within reach, scattered attention, reduces most of the training’s benefit. Fifteen focused minutes are worth far more than a distracted hour, and that’s precisely why the program stays deliberately short.
A sixth mistake, rarer but real, is over-training one single aspect of the motion at the expense of others, for example spending entire weeks on isolated trigger work because it’s the exercise that gives the strongest feeling of mastery, while neglecting breathing or transitions. The program works precisely because it balances the skills worked week after week; straying from that durably unbalances overall progress.
A last mistake, common among the most motivated shooters, is multiplying daily sessions thinking more training necessarily equals more progress. Beyond a certain threshold of repetitions in a single day, concentration fatigue degrades the quality of the motion being trained, which amounts to automating a flaw rather than a correction. A single quality daily session is worth more than three tired, rushed ones.
Adapting the program to your discipline
This 4-week program works as a common base, but each discipline benefits from specific adjustments once the fundamentals are in place. In rifle precision shooting, the extra emphasis is on prolonged postural stability, with longer position holds starting week 3.
In dynamic shooting on cardboard or metal targets, week 4 is worth extending or repeating, since transitions between aim points are the core of performance in these disciplines. An experienced club instructor will know how to point a shooter toward the most relevant exercise variants for the exact discipline practiced.
In shooting with antique or black-powder firearms, dry fire keeps all its value for trigger and sight work, even though these guns’ reloading specifics don’t lend themselves to fast transition exercises. The emphasis then stays focused on weeks 1 and 2 of the program.
For shooters practicing several disciplines in parallel, it’s entirely possible to alternate the fictional aim points and positions worked from one session to the next, as long as the same safety rigor and the same progressive logic across the 4 weeks are maintained.
In all cases, this program remains a complement to real practice at the club and range, not a substitute. Dry fire builds motor automaticity, but only practice with ammunition allows validating that automaticity against real recoil, noise, and report.
For shooters practicing clay target shooting, the dry fire exercise takes a slightly different form since the notion of static aiming is less central than tracking the target’s movement. The work then focuses on the mount, the fluidity of raising the gun, and the coordination between the eyes and the barrel’s movement, rather than on a fixed alignment.
In recreational or beginner air gun shooting, often practiced with category D guns freely sold or subject to simple registration depending on the model, dry fire retains all its educational relevance, particularly for new license holders just discovering trigger control. It’s often the most accessible training ground for building the very first automaticities before moving to more demanding calibers.
Whatever the discipline, the principle that never changes is progressiveness: consolidating one skill before adding a new one, rather than trying to work everything simultaneously from the first week. It’s this sequencing, more than the precise content of each exercise, that gives this program its real value.
Measuring your progress without fooling yourself
The temptation is strong, after a few weeks of dry fire, to feel “much more precise” without anything concrete confirming that impression. The logbook exists precisely to objectify that feeling rather than blindly trusting it.
A simple method is to note, at the end of each week, three factual elements: the number of sessions actually done over the 7 days, a numerical self-assessment of sight stability on a simple scale, and a free-form note on difficulties encountered. These three pieces of data, cross-referenced over several weeks, give a far more reliable picture than an isolated impression.
The real validation of dry-fire work happens at the range, during the following live sessions. Comparing a group obtained after a 4-week dry-fire cycle with an earlier group, under similar conditions (same distance, same gun, same ammunition), gives a concrete measure of skill transfer.
You have to stay cautious with numbers: a group’s dispersion depends on many factors (fatigue, ammunition, range conditions), and a single group is never enough to draw a conclusion. It’s the trend across several sessions, logged over time, that has real value, not an isolated result.
A shooter who repeats this 4-week cycle several times a year, adjusting exercises based on weaknesses identified at each review, builds a far more solid cumulative progress than one who practices dry fire occasionally and haphazardly.
An often overlooked but very telling indicator is the consistency of the group rather than its raw size. A shooter may get a group that’s overall wider than before, but noticeably more consistent from shot to shot and better centered on the aim point: that’s often the sign that dry trigger work is paying off, even if the group size alone doesn’t show it right away.
It’s also useful to seek out, at least once per 4-week cycle, the perspective of an instructor or an experienced club shooter on the results achieved at the range. An outside eye used to reading groups often spots signals (residual vertical dispersion, systematic shift in one direction) that the shooter themself, focused on their own sense of progress, has a harder time objectifying alone.
Progressing in sport shooting remains, ultimately, far more a matter of patience and consistency than a stack of isolated tricks or tips. Dry fire is just one tool among others, but it’s one of the few that requires no range infrastructure, no ammunition, and no travel, to produce measurable effects over time.
FAQ
Q: How long before you see a difference at the range? A: It varies enormously depending on the shooter and their starting level, but many report a noticeably crisper trigger feel by the end of the first 4-week cycle. The real measure remains comparing groups under similar conditions, not an isolated impression.
Q: Does dry fire damage the gun’s mechanism? A: It depends on the exact gun model — some striker mechanisms need a dummy round or a striker buffer to avoid wear, others don’t. Check with the manufacturer or a gunsmith for your specific model rather than relying on a general rule.
Q: Can you practice dry fire in an apartment? A: Only if the training area is set up to eliminate all risk, with a safe aiming direction toward a load-bearing wall with no living space behind it and no ammunition present in the room. If these conditions can’t be guaranteed, it’s better to abstain and practice elsewhere.
Q: Do you need a special holster to work on dry draws? A: A holster identical to the one used at the club or in competition is recommended so the trained motion transfers directly to live practice. A different holster changes the motor references and reduces part of the exercise’s benefit.
Q: Is this program suitable for a complete beginner? A: Yes, provided an instructor has already validated the basics of safety and gun handling before starting the exercises alone. Dry fire is an excellent complement from the very first weeks of club practice, never a substitute for initial supervision.
Q: Can the program be extended beyond 4 weeks? A: Yes, many shooters repeat this cycle several times a year, adjusting exercises based on weaknesses identified in their logbook. The 4-week structure is a starting framework, not a final limit.