
The false debate
On forums and in clubs, the same question keeps coming back: bipod or shooting bag? Framed that way, it starts off on the wrong track. These aren’t two competitors aiming for the same function — they’re two tools with different strengths depending on terrain, shooting position, and context.
A seasoned club shooter who’s practiced precision shooting for years never thinks in terms of “which one do I pick.” He thinks in terms of “which one do I use for what.” The bipod lives at the front of the rifle, adjusts in height, and adapts to uneven terrain to a certain extent. The shooting bag sits wherever there’s a support, absorbs recoil differently, and often serves as a complement rather than a replacement.
Part of this confusion comes from manufacturer marketing, which sometimes presents products as universal solutions when each actually answers a specific use case. A bipod sold as “all-terrain” is still, at the end of the day, a rigid system with fixed legs. A bag sold as “versatile” still needs a horizontal support to work properly.
This article goes through both options point by point: stability depending on terrain, behavior in position, behavior under recoil, combined use, the specifics of the bean bag in benchrest, practicality, durability, and respective budget. The goal isn’t to crown a universal winner, but to give you what you need to choose based on your actual practice — and avoid the default purchase that many beginners regret a few months in.
It’s also worth restating an obvious point that gets forgotten too often: neither the bipod nor the bean bag replaces a good basic shooting position. They’re stability multipliers, not fixes for poor posture. A shooter who compensates for weak core bracing or poorly controlled breathing with an external support progresses more slowly than one who works on their body first and adds equipment as reinforcement afterward.
Stability on flat terrain and at a covered range
At a covered range, with a concrete firing point or a stable table, the bipod does remarkable work. Its legs adjust independently or together depending on the model, and once set, it doesn’t move. The shooter can release a good part of the tension in the arms and focus on breathing and trigger control.
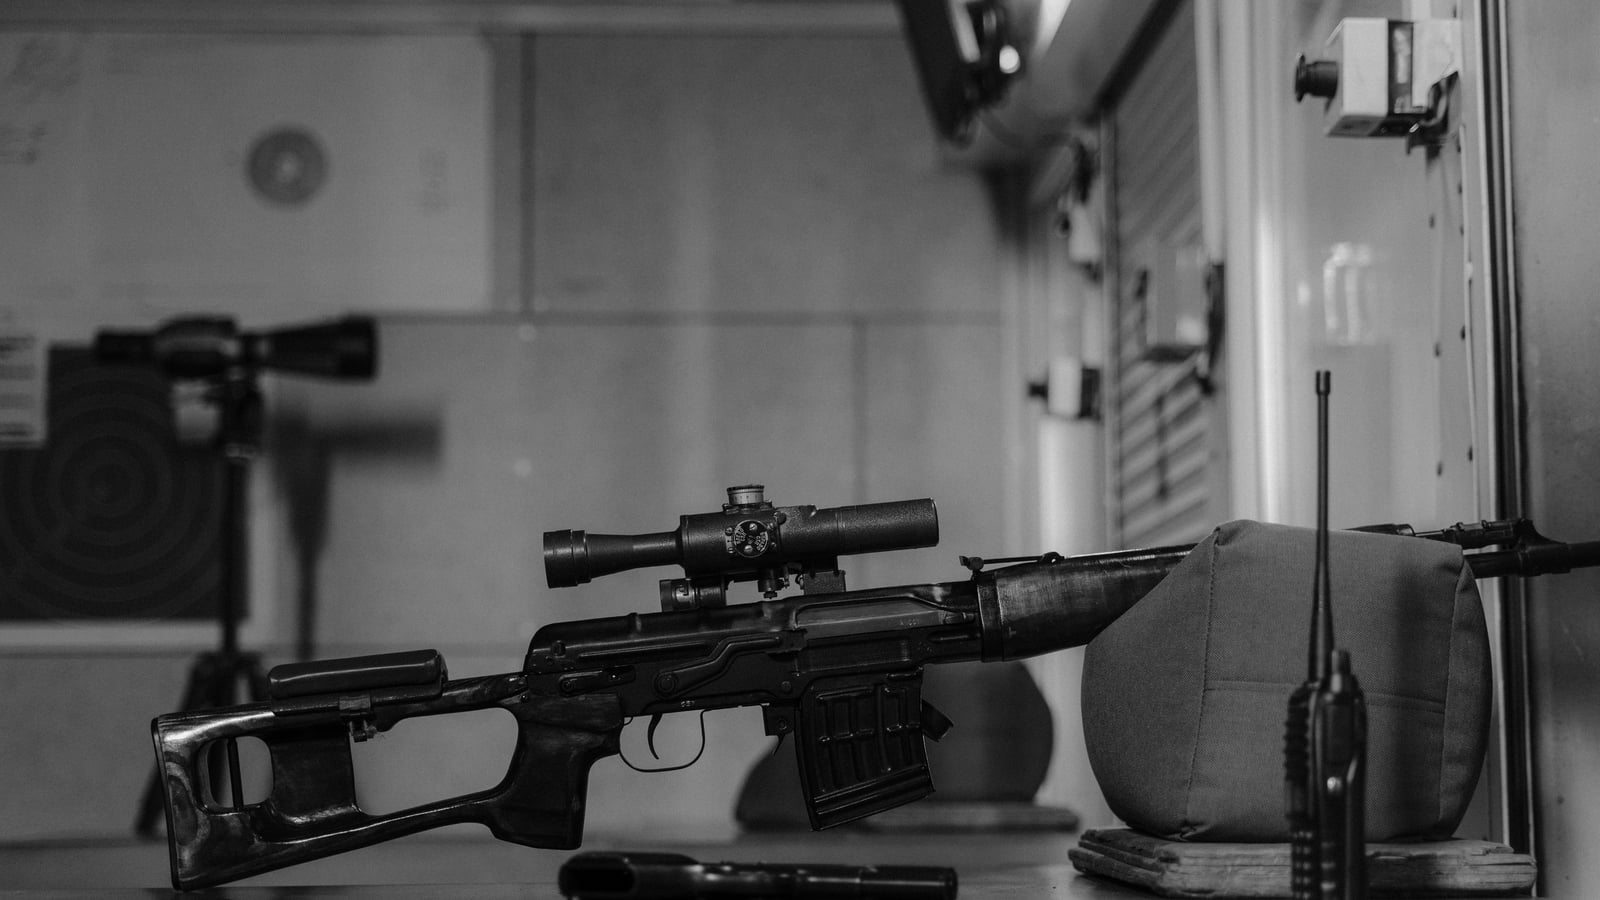
The shooting bag, on this same flat terrain, requires something the bipod doesn’t: an existing support surface. On a range table, you set the bag down, rest the rifle’s forend on it, and the rifle sinks slightly into the bag at the moment of the shot. That cushioned sinking absorbs part of the recoil differently than a rigid bipod does.
Under covered-range conditions, both solutions work well. The difference comes down to the shooter’s feel: some prefer the “anchored” sensation of the bipod, others prefer the give of the bag, which conforms to the shape of the forend with no metal play. An experienced instructor will often have a beginner try both from the very first sessions, precisely because the preference is highly personal and depends on body type, breathing style, and even the type of rifle used.
A factor often overlooked at covered ranges: the height of the firing point relative to the table. Some ranges have low tables, others elevated stations with a built-in arm rest. The bipod adapts easily to these variations thanks to its adjustable legs, whereas the shooting bag depends entirely on the height of the available support — if it’s too low or too high relative to the shooter’s natural position, you sometimes have to stack several bags or add a mat to correct the shooting angle, which can introduce extra instability if the stacking isn’t done carefully.
It’s also worth mentioning the sound and vibration side of covered firing lines: on some ranges, the table itself transmits vibrations from shots fired at neighboring positions. A rigid bipod potentially transmits those vibrations to the rifle more directly than a bag, which, being soft by nature, filters out some of that external disturbance. It’s a detail rarely measured scientifically by shooters themselves, but many report it empirically during sessions at busy ranges.
Stability on uneven terrain and ground positions
This is where the two tools really diverge. On sloped, rocky terrain, or terrain with low vegetation, a bipod with fixed or poorly adjusted legs can tip over or end up resting on a single contact point. Some models offer lateral tilt (the “cant”) that fixes this problem, but not all entry-level bipods have it, and this feature takes some time to learn to use effectively under competition pressure.
The shooting bag, on the other hand, literally molds itself to the terrain. Set on a rock, a bump, a berm, it conforms to the irregularities and provides a stable rest even on a surface that isn’t flat. That’s a real advantage in outdoor precision shooting, especially in “field” positions where the ground is never perfectly horizontal. The granular fill inside the bag redistributes under the weight of the rifle and forms a cradle that follows the contour of the support — something impossible with a rigid-leg system.
In the prone position with a light rifle, the bipod still holds its ground if the terrain is reasonably flat, since it frees up a hand the shooter can use to stabilize the rear of the stock. That combination is exactly what opens the door to the combined use covered further below.
There’s also an often-overlooked in-between case: soft ground, like fine sand or waterlogged earth after rain. On that kind of surface, a bipod tends to sink unevenly from one leg to the other unless the shooter takes care to firmly seat each foot before firing. A shooting bag, placed on a rigid support above the soft ground (a backpack, a log, a flat stone), avoids this issue since it never rests directly on the ground itself.
Another aspect worth considering is tall vegetation or brush found on some outdoor precision shooting terrain. A bipod with thin legs can get caught between branches or dense clumps of grass, forcing the shooter to clear the area before setting up. The shooting bag, simply set on top of whatever support is available, largely sidesteps this constraint since it doesn’t need direct, clear ground contact.
The bipod in standing and sitting positions
The bipod shows its limits as soon as you leave the prone position. Sitting with crossed legs or cross-legged, some longer-legged models can still serve as a front rest if the shooter adapts their posture, but the stability gain drops noticeably compared to prone, where body weight and ground contact work together.
Standing, the bipod attached under the forend becomes dead weight: it no longer touches anything, it swings loose, and some shooters fold it back entirely so it doesn’t get in the way of gripping the forend or bang against the support-arm’s forearm. This is a point often overlooked by beginners who buy a bipod thinking it will universally stabilize all their shooting positions, when it’s really designed for prone and, to a lesser extent, resting on a fixed support while seated.
The shooting bag, in these upright positions, also loses relevance since it requires a horizontal surface underneath it. A standing shooter obviously can’t set a bag down “in mid-air” — they’d have to either lean against a tree or post with the bag wedged in between, or give up on any external support and rely solely on their posture. Neither replaces solid core bracing and posture work for unsupported positions — these are supplementary tools, not miracle fixes for a lack of body stability.
Some shooters nonetheless use a small shooting bag while seated, wedged between the knee and the rifle’s forend, which creates a fairly effective improvised rest that dampens the arm’s natural tremor. This technique takes some practice to find the right angle, but it illustrates well how versatile the bag is compared to a bipod, which by design remains dedicated to ground or table use.
Kneeling, an intermediate position between sitting and standing, is where a folded bipod is useless, and the shooting bag again becomes the most realistic option, set on the raised knee or on an improvised support at the right height. It’s a position rarely used in pure precision competition, but common in certain sport-shooting disciplines that combine several postures within the same course.
Behavior under recoil
The rigid bipod transmits part of the recoil directly to the ground through its legs, which can cause a slight bounce or jump of the rifle’s front end depending on the bipod’s rigidity and the ammunition’s power. Some spring-loaded or built-in damping models reduce this effect, at the cost of a higher price and sometimes an adjustment period for shooters used to the feel of a classic rigid bipod.
The shooting bag absorbs recoil through deformation: the sand or beads inside settle slightly under the impact, giving a “softer” recoil feel and a barrel that’s less prone to jumping upward. This is one of the reasons why many precision shooters on fixed targets prefer a bag under the rear of the stock, even when a bipod is already set up at the front.
This difference in recoil behavior explains why combining both tools is so widespread among experienced shooters, rather than a binary choice between one or the other. A bipod that lets the rifle’s front end jump slightly delays the return to the aiming position after each shot, which matters when shooting at multiple targets or in a timed string.
The phenomenon of “bipod hop” (the bipod jumping at the moment of the shot) has actually been documented and discussed for a long time among precision shooters who use rigid bipods pressed against the ground. The technique often involves loading the bipod slightly forward with the shoulder before the shot breaks, which limits this bounce — a technique that requires practice and isn’t intuitive for a beginner. The shooting bag, by its absorbing nature, largely avoids this problem without any particular technique to learn.
It’s also worth noting that ammunition type strongly influences this dynamic. A rifle chambered for a heavy-recoiling caliber puts more demand on the support’s absorption capacity, whether rigid or soft. On more moderate-recoil calibers, the difference between bipod and bag becomes less noticeable for a less experienced shooter, even though it remains measurable in groupings under rigorous competition conditions.
Combined use: the solution most shooters actually rely on
In practice, in fixed-target precision shooting, the overwhelming majority of experienced shooters don’t pit bipod against bag: they use both together. The bipod stabilizes the front of the rifle, the bag wedges under the rear of the stock, under the cheek or the toe of the stock.
This combination allows micro-adjustments impossible with a bipod alone. To adjust elevation by a tenth of a minute of angle, you just need to squeeze the rear bag slightly to raise or lower the barrel, without touching the scope’s settings or moving the rifle. It’s a technique every experienced instructor teaches from the very first prone long-range sessions, since it lets you correct a point of impact without disturbing the rest of the shooting position.
Some shooters even replace the bipod with a front bag in addition to the rear bag, forming a “front bag + rear bag” duo particularly popular in benchrest, precisely because this combination eliminates any rigid mechanical part between the rifle and the support.
The typical setup sequence of an experienced shooter illustrates this complementarity well: they first set down the bipod or front bag, roughly adjust the height and overall angle, then fine-tune with the rear bag for precise adjustment. This two-step method — rough then fine — carries over directly from one discipline to another, whether shooting paper targets, steel animal silhouettes, or long-range precision shooting.
Another, lesser-known combined use involves slipping a small soft bag between the bipod’s legs and a hard surface, like concrete or stone. This bag then acts as a shock absorber under the bipod itself, reducing bounce at the moment the shot breaks while keeping the bipod’s characteristic quick setup. It’s a trick many club shooters discover only after several years of practice, often through trial and error rather than formal instruction.
Why the bean bag dominates in pure benchrest
Bench-rest precision shooting, where the shooter stays set up at a fixed station with all their gear laid out on a dedicated table, clearly favors the shooting bag. In this very specific context, the shooting bag becomes the go-to tool for a simple reason: the total absence of mechanical play.
A bipod, even a high-end one, has joints, adjustment screws, sometimes a telescoping system. Each of these elements introduces a micro-play that, at distances where you’re chasing very tight groups, can translate into measurable dispersion. The shooting bag, on the other hand, has no moving parts: it compresses and releases reproducibly, shot after shot.
That’s why competitors in this type of event often invest in several bags of different sizes — a wide, low front bag for the forend, a smaller “rabbit-ear” rear bag to wedge the stock — rather than in a premium bipod. The ratio between repeatable precision and cost clearly favors the bag in this specific practice.
The very shape of bags dedicated to this use has been refined over decades by the bench-rest shooting community. The front bag, often casually called by its shape a “flat bag” or “wide bag,” offers a stable base that keeps the forend from rolling sideways. The rear bag, smaller and pinched at the sides, allows precise handling for the micro-adjustments described above. This specialization of shapes shows just how much the shooting bag isn’t a simple improvised cushion, but an accessory designed for a very specific function.
An important technical detail: the texture and grain of the fill directly affects friction between the bag and the rifle’s forend. A fill that’s too fine can let the rifle slide slightly at the moment of recoil, while a fill that’s too coarse can create uneven pressure points under the forend. Experienced shooters often test several fill types — fine sand, rice, hard plastic beads — before finding the one that best suits their rifle setup and shooting style.
It’s worth noting that bench-rest precision shooting also imposes its own regulatory constraints depending on the discipline and club. Some competitions strictly regulate the type of support allowed, which means that before investing in a dedicated bag set, it’s better to check the rules of the target discipline directly with your club or federation.
Transport practicality and setup
The bipod has an obvious practical advantage: it stays attached to the rifle, doesn’t get lost, and deploys or folds in a second. For a shooter moving between several firing positions, or practicing outdoors with walking involved between spots, that’s a real gain in time and simplicity.
The shooting bag, by contrast, is a separate object that has to be carried, set down, and repositioned every time you change spots. Filled with sand or plastic beads, it has real weight — often anywhere from several hundred grams to a few kilos depending on the model and fill — which matters when you’re already carrying a rifle, a spotting scope, and ammunition over several hundred meters.
Some bags are sold empty, to be filled on-site with sand or rice, which lightens the transport but adds a logistical constraint. Other models use lightweight beads that reduce weight without sacrificing too much stability.
For a shooter practicing in the mountains or on sport-hunting terrain with long approach hikes, the combined weight of two or three shooting bags can become a real drag, which naturally pushes this type of shooter toward the bipod, lighter once mounted on the rifle and not requiring a separate bag to carry. Conversely, a shooter who stays set up at the same station all day has no weight constraint to consider and can favor the comfort of the bag without any logistical downside.
Setup speed also deserves a closer look. A bipod pre-adjusted ahead of time deploys in a fraction of a second, which matters in timed shooting or clocked competition. The shooting bag requires finding a support, positioning it, resting the rifle on it, and often adjusting the bag’s own position with small movements before finding the right seating. In an event where every second counts, this difference in setup can weigh on the shooter’s final choice.
Storage between sessions is also worth mentioning. A folded bipod stows against the rifle’s forend and takes up practically no extra space in a transport case. One or more shooting bags take up their own volume in the gear bag, which can become a limiting factor for a shooter traveling light or having to respect baggage weight limits — for instance when traveling to a competition on the other side of the country.
Durability, maintenance, and technical criteria to check before buying
A well-maintained bipod lasts years without major issues, provided you regularly check the tightness of the screws and the condition of the return springs on telescoping models. Exposure to moisture can, over time, seize the adjustment mechanisms on entry-level models not treated against corrosion.
The shooting bag ages differently. The outer fabric can wear from rubbing against the barrel or forend, and the fill can settle or, with certain materials, absorb moisture if left outside in the rain. A quality bag uses an abrasion-resistant ballistic fabric, which noticeably extends its lifespan compared to a low-end bag made of thin fabric that can tear after a few dozen sessions of intensive use.
In both cases, basic maintenance is simple and requires no special tools — regular cleaning is enough, with no complex disassembly. For the bipod, a visual check of the mounting points and an occasional light greasing of the moving parts is enough to prevent most failures. For the shooting bag, it’s enough to check every so often that the seams are holding and the fill hasn’t shifted unevenly inside.
Storage between shooting seasons also plays a role in the longevity of both pieces of equipment. A metal bipod left in a humid environment, even indoors, can develop rust spots on screws and springs if the surface treatment isn’t good quality. A shooting bag stored in a damp place can have its fill set into a compact block if moisture seeps through the fabric, degrading its cushioning qualities even without any visible external damage.
Finally, the question of repairability clearly sets the two products apart. A damaged bipod (broken screw, worn spring) can often be repaired piece by piece if the manufacturer offers spare parts, extending its useful life. A torn shooting bag can easily be resewn yourself with sturdy thread, and its fill can be fully replaced for minimal cost — making it, over the very long term, a particularly economical piece of equipment to maintain.
Beyond routine maintenance, several technical characteristics deserve close attention before buying, beyond the sticker price alone. For a bipod, the mounting system comes first: some bipods clip onto a “sling stud” style anchor point, others mount on a Picatinny rail or similar. Check that the system matches your rifle before buying, since adapters aren’t always interchangeable between brands.
The adjustable height range is a second decisive criterion. A short-legged bipod works perfectly for pure prone shooting but quickly becomes limiting if you also want to use it on a berm or small mound in a semi-seated position. Long-legged models, adjustable over a wider range, cost more but cover more terrain situations.
Whether or not there’s a lateral tilt function also changes the bipod’s real-world usefulness a great deal. Without it, setting the rifle on slightly canted terrain forces the shooter to compensate with their body, which tires them out and hurts precision over the course of a session. With it, the bipod absorbs the cant itself and lets the shooter focus on breathing and trigger control.
For a shooting bag, the deciding criteria are different. The quality of the outer fabric determines its lifespan against abrasion from the barrel and forend. The type of fill directly affects the contact texture and cushioning capacity — fine sand gives a very stable contact but can get heavier with moisture, while plastic beads stay lighter and water-insensitive, sometimes at the cost of slightly different friction under the forend.
The shape of the bag also matters a great deal. A wide, low front bag suits wide, flat forends, typical of modern precision rifles, while a thinner or rounder forend needs a different bag shape to avoid any lateral roll at the moment of the shot. A saddle-shaped rear bag with side “ears” allows more precise seating of the stock than a simple rectangular cushion.
Impact on the shooter’s learning curve and progression
A point rarely addressed in standard comparisons concerns the effect each support has on a beginner’s learning curve. A bipod, by strongly stabilizing the front of the rifle, can mask certain breathing or trigger-management flaws that would become disqualifying in an unsupported position. The shooter’s groupings improve, but not necessarily their fundamental body technique.
The shooting bag, especially when used alone without a bipod, requires a minimum of active position management to keep the rifle stable throughout the whole aiming and firing cycle. This slightly higher demand may seem tedious at first, but it pushes the shooter to work on fundamentals that will remain useful even without support — for instance, when shooting standing with no rest at all.
That’s why many experienced instructors recommend beginners start with the shooting bag alone before introducing the bipod, precisely to build a solid base of body management first. Once that base is acquired, adding a bipod becomes a genuine gain in comfort and speed rather than a crutch masking technical gaps.
Tracking this progression in black and white, session after session, changes the game for making the feeling objective. Logging in a digital shooting logbook which support you used, the distance, the number of rounds, and the size of the grouping obtained lets you objectively compare each piece of equipment’s real contribution over time, rather than relying solely on a session-to-session impression that can be skewed by fatigue, weather, or how you’re feeling that day.
Respective budget
Budget is often the deciding factor for many shooters. A basic shooting bag can be found at a very affordable price, and it’s even possible to make one yourself with sturdy fabric and rice or sand, which lowers the cost further for a beginner who wants to test the waters without investing much.
The bipod, even entry-level, generally costs more than an equivalent bag, and premium models with fine adjustments, lateral tilt, and quick mounting can represent a significant investment. Price varies a lot depending on brand, materials, and mounting system — it’s better to check directly with a gunsmith or club rather than rely on a fixed figure, since the gap between models is so wide.
For a shooter starting out in precision, the budget logic often points toward a shooting bag as the first purchase, with the option of adding a bipod later if the practice sticks and the shooting style (frequent moves between positions, varied outdoor terrain) justifies it.
This calculation should also factor in the cost of the bipod’s mounting system on the rifle itself. Depending on the rail or anchor point available under the forend, you may need to buy an additional adapter for the chosen bipod to mount correctly, which adds to the final bill compared to the bipod’s sticker price alone. The shooting bag, on the other hand, requires no particular compatibility with the rifle since it’s never directly attached to it.
Long-term replacement cost also deserves a comparison. A quality bipod, properly maintained, is close to a one-time purchase that lasts through years of practice with no need for renewal. A shooting bag, even a good-quality one, eventually wears on the surface with regular intensive use and may need its fabric or fill replaced after several years — something that should factor into a long-term total-cost view rather than just the initial purchase price.
What to choose based on your profile
If you mainly practice prone on uneven terrain, outdoors, moving between several firing positions, the bipod brings real flexibility of use and fast setup. Add a small rear bag and you cover most of the situations you’ll encounter in this type of practice.
If you practice bench-rest precision shooting at a fixed table, the bag duo (front and rear) remains the reference for repeatable groupings, with a noticeably more accessible entry budget than a high-end bipod.
If your budget is tight and you’re just starting out, begin with a simple bag, possibly homemade, and log your groupings session after session to make progress objective rather than relying on impressions.
If you practice several different disciplines throughout the year — some bench-rest at a table, some prone outdoors, a few refinement sessions at the club — the combination of bipod plus rear bag remains the most versatile choice, with the option of gradually investing in a second front bag for pure bench-rest sessions where extreme precision takes priority over mobility.
In any case, choosing your support should never take priority over the fundamentals: consistency of sessions, breathing management, trigger quality, and rigorous tracking of results. A digital shooting logbook helps you precisely compare your performance with and without support, and see concretely what actually tightens your groupings over time — support by support, distance by distance, session after session.
FAQ
Q: Can you use a bipod and a shooting bag at the same time? A: Yes, it’s even the most common practice among experienced precision shooters. The bipod stabilizes the front, the bag wedges the rear of the stock and allows micro-adjustments of elevation.
Q: Does a bipod work for standing shooting? A: No, it loses almost all its value standing since it no longer touches the ground. It stays relevant mainly prone and, to a lesser extent, seated or on a fixed support.
Q: Do you need a specific bag for bench-rest precision shooting? A: Yes, most competitors use a duo of dedicated bags (a wide one in front, a smaller one in back) rather than a bipod, to eliminate all mechanical play and maximize shot repeatability.
Q: Is a homemade shooting bag as effective as a commercial one? A: A homemade bag with sturdy fabric and good fill can work very well for getting started. A commercial model generally offers more durable fabric and an optimized shape, which shows mostly over the long run.
Q: What budget should you plan to get started properly? A: This varies a lot depending on the brands and models chosen. To get started, a simple shooting bag is the most accessible budget option; check with a gunsmith or your club to compare current prices based on your specific needs.
Q: Does the choice depend on the caliber used? A: Indirectly, yes: the more recoil the ammunition generates, the more noticeable the absorption offered by a bag or a damped bipod becomes. On low-recoil calibers, the difference between the two options is less pronounced.