
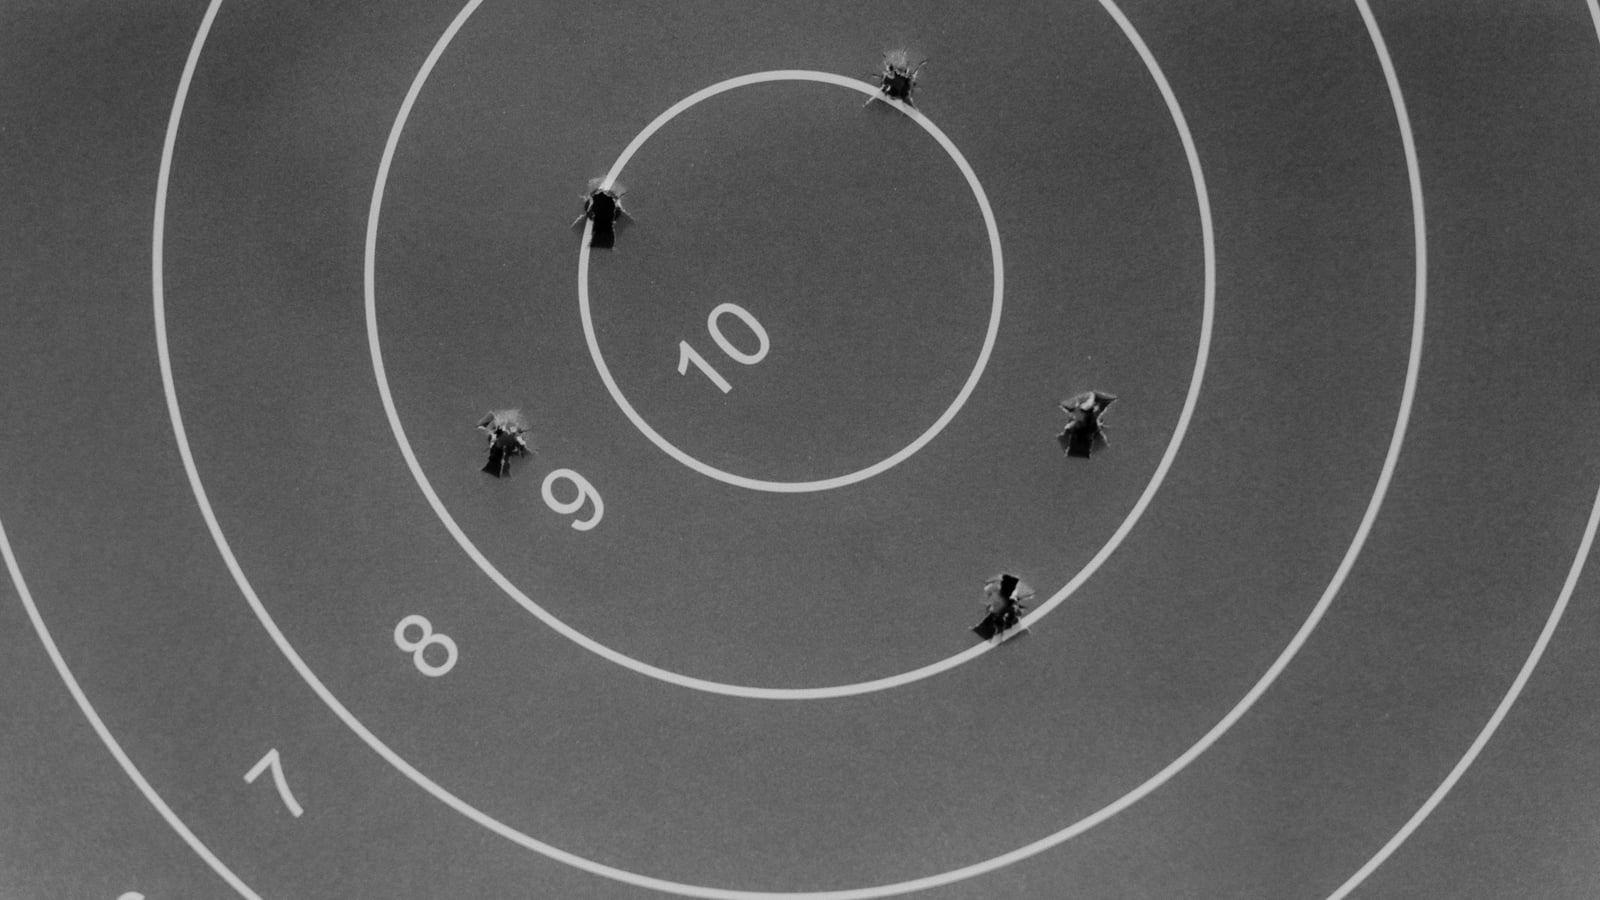
Why your group tells you more than your score
A score tells you how many points you scored. A group tells you why. That’s the difference between looking at the final result and looking at the mechanism that produced it, and it’s this second reading that lets you progress fast instead of spinning your wheels for months.
Many shooters look at their target, see a decent or average score, and pack up their gear without ever pausing to look at the actual shape of their impacts. They miss the single most useful piece of information from the whole session: dispersion is never random, it always has an identifiable technical cause.
This article gives you a complete method for reading your groups like a real diagnosis. You’ll learn to distinguish vertical dispersion from horizontal dispersion, to spot the characteristic signatures of each technical fault, and to set up a tracking system over time that turns isolated targets into real progression data.
This reading applies to every precision discipline: rifle and pistol at 10m, 25m, 50m, long-range precision shooting, and even certain aspects of dynamic shooting where group analysis remains relevant during the static phases. The diagnostic principle doesn’t change — only the scale of the reading adapts to distance and caliber.
One last point before we start: this method demands rigor and patience. A single group never tells you much that’s reliable — it’s repetition and cross-checking observations over time that give this practice real diagnostic value.
This diagnostic approach also changes how a training session unfolds. Instead of simply burning through rounds hoping repetition alone is enough to improve, you start each session with a hypothesis to test and end it with a concrete observation to try next time. It’s this loop that turns passive training into real, structured progression work.
What a group can actually teach you
A shot group is the physical trace of everything that happened between the moment you took your position and the moment the projectile left the barrel. Each impact is the result of a chain of factors: position, breathing, sight alignment, trigger management, and the overall stability of the shooter-weapon system.
When that chain is perfectly reproducible shot after shot, the impacts tighten up. When one link in the chain varies from shot to shot, the impacts spread out in the direction corresponding to that weak link. It’s this correspondence between the direction of dispersion and a technical cause that forms the core of group analysis.
You need to understand one thing clearly: a wide group isn’t just “worse” than a tight one — it’s also visually less informative if it has no distinct shape. Conversely, a group that shows a clear direction of dispersion — a sharp vertical axis, a marked horizontal spread, a star shape — gives you a concrete, actionable lead you can work on starting next session.
It’s also essential to separate what belongs to the shooter from what belongs to the equipment. A poorly zeroed weapon, an optic that’s shifting, a fouled barrel, or poor-quality ammunition can all produce dispersion that looks like a technical fault. Before concluding it’s purely a human problem, you need to have reasonably ruled out the obvious equipment causes.
Finally, the absolute size of a group means nothing without context: shooting distance, the weapon used, the shooter’s level, and even the day’s conditions strongly influence what can be considered “good” or “needs work.” A group of a few centimeters at 25 meters with a pistol doesn’t carry the same meaning as a group of the same size at 10 meters with a rifle.
One last factor conditions the quality of this whole analysis: objectivity when looking at your own targets. It’s humanly tempting to minimize a bad group by blaming the ammunition or outside conditions, or conversely to take all the credit for a good group without really understanding its cause. An experienced coach watching from outside often spots the real cause faster than a shooter facing their own target alone, precisely because they don’t have that emotional stake attached to the result.
Forcing yourself to look at your own groups with the same rigor you’d apply to another club shooter’s is a mental exercise in its own right. It’s often what distinguishes a shooter who progresses steadily from one who stagnates despite a comparable training volume: the first accepts seeing what their target really shows them, even when it isn’t flattering.
Vertical dispersion: the signal of breathing and recoil
When your impacts spread mainly from top to bottom while staying tight horizontally, the most likely lead is on the breathing and recoil-management side. This is one of the most classic — and, once correctly identified, one of the easiest — signatures to fix.
Breathing directly affects the height of the point of impact because the rib cage moves and slightly shifts the whole torso, and with it the sight line. If you fire at different points in your breathing cycle — sometimes mid-inhale, sometimes after a full exhale, sometimes on a precarious held breath — every shot leaves from a slightly different sight height. The result is a vertical spread that directly reflects that breathing variability.
The solution isn’t to hold your breath indefinitely, which instead generates tremor and fatigue. It’s to find a natural, reproducible respiratory pause point — usually after a half exhale — and to trigger the shot systematically at that same point in the cycle every time. The consistency of the pause point matters more than its exact position.
Recoil, and how the body absorbs it, also plays a direct role in vertical dispersion. A grip or shoulder position that shifts slightly from shot to shot changes how the weapon rises after firing, and therefore the trajectory perceived by the shooter for the next shot — even though this effect shows up mostly on shots fired close together in time.
A recoil-management fault often shows up as impacts that climb progressively over the course of a string, rather than as symmetric vertical dispersion. That’s a useful clue: symmetric vertical dispersion points more toward breathing, a progressive upward drift points more toward recoil and position management.
It’s also worth noting that muscle fatigue late in a session almost always amplifies vertical dispersion, independent of breathing. A shooter who fires long strings without a break will often see their last few groups spread vertically simply because the stabilizing muscles start to tire.
Horizontal dispersion: the signal of trigger and grip
When dispersion shows up mainly left to right, the most common cause lies on the side of trigger management and how the weapon is gripped. This is a slightly harder fault to correct than vertical dispersion, because it involves a fine, often unconscious movement.
Lateral movement of the finger on the trigger is the most common culprit. If the finger applies pressure that isn’t perfectly aligned with the trigger’s axis — pulling slightly sideways instead of pressing straight back — the weapon deviates laterally at the exact moment the shot breaks. This fault is often invisible to the shooter themselves, who feels like they’re pressing correctly.
Finger placement on the trigger directly influences this phenomenon. A finger positioned too deep, with the first joint rather than the pad on the trigger, tends to generate a lateral pulling component, especially for shooters with large hands on a weapon with a compact grip.
The weapon’s overall grip is the other major factor in horizontal dispersion. An asymmetric grip, where one hand squeezes harder than the other, or a grip that unintentionally tightens at the moment the shot breaks, creates a lateral twist that translates directly into a horizontal spread of impacts.
A useful clue for telling the two causes apart: a pure trigger fault tends to produce a relatively homogeneous, centered horizontal dispersion, while a grip fault often produces a constant drift to one side, with the same hand systematically creating the same bias shot after shot.
Stress and nervous fatigue also amplify this type of dispersion, especially late in a string or under competition pressure. A shooter who’s normally clean horizontally can see this dispersion appear only under pressure, which points to a stress-management issue more than a genuine underlying technical fault.
Star or cross-shaped dispersion: when several factors combine
Some groups show neither a dominant vertical nor horizontal axis, but a diffuse star or cross shape, with impacts scattered in every direction with no apparent logic. This configuration generally indicates a combination of several faults rather than a single dominant cause.
This type of dispersion is the most frustrating to correct because it doesn’t give an obvious lead at first glance. The right approach is to isolate variables one at a time rather than trying to fix everything at once, which would make it impossible to identify what actually worked.
An effective method is to temporarily go back to a very simple, very controlled exercise — a few isolated shots with long pauses between each, consciously checking breathing, grip, and finger placement on every repetition. This often tightens the group by eliminating the accumulation of small errors that combine during rapid fire or long strings.
You should also seriously consider the equipment angle when dispersion is truly erratic and has no recognizable shape. A loose optic mounting point, a loosened stock screw, or inconsistent-quality ammunition can all produce this type of diffuse dispersion that mimics a technical problem.
A star-shaped group in a beginner is often simply the normal reflection of a technique still under construction on every front at once: position, breathing, sight alignment, and trigger control aren’t yet individually stabilized. It’s not a warning sign — it’s a normal stage of progression that naturally tightens up with repeated practice of the fundamentals.
For a more experienced shooter, a star-shaped group that suddenly appears after a long stretch of well-tightened groups deserves special attention. This abrupt change of shape, with no obvious explanation tied to fatigue or context, points more toward a one-off equipment cause than a generalized technical regression, which would tend to show up gradually rather than all at once.
In this specific case, the first thing to check is everything that might have changed since the last clean group: a new batch of ammunition, a recent teardown of the weapon for maintenance, a change of accessory or setting. An isolated star-shaped group after an identifiable change points almost always to that change rather than to some technical mystery to solve.
Telling a shifted point of impact apart from wide dispersion
There’s an important difference between a tight group that’s offset from center and a wide group that’s centered. These two situations call for completely different corrections, and confusing them leads to adjustments that are useless or even counterproductive.
A tight but offset group — for example consistently low and left — generally indicates a zeroing problem rather than a shooter problem. If your impacts are reproducibly landing in the same offset spot, your technique is probably consistent — it’s your aim point or your optic/sight adjustment that needs correcting, not your form.
Conversely, a group that’s centered on the right zone but wide and dispersed indicates a technical consistency problem rather than a zeroing problem. Adjusting the optic in this case changes nothing about the underlying issue: you’re just moving a scattered cloud of points around, not tightening it.
The classic trap is reacting to a single isolated shot that lands far from the rest of the group by immediately changing your zero or your technique. An isolated impact can be a real signal, but it can also be a one-off anomaly caused by a gust of wind, slightly different ammunition, or a momentary lapse in concentration unrelated to any real recurring fault.
The practical rule is simple: an offset or a dispersion needs to be confirmed across several consecutive groups before triggering a corrective action, whether that’s an equipment adjustment or targeted technical work. Reacting to a single group risks correcting a problem that doesn’t really exist.
The role of distance in reading a group
Shooting distance completely changes the scale at which you read a group, and it’s a point many shooters underestimate. The same technical fault produces a very different offset in centimeters depending on whether you’re shooting at 10, 25, or 50 meters, because the angular error at the muzzle amplifies proportionally with distance.
Concretely, a trigger fault that stays invisible at 10 meters because it only shifts the impact by a few millimeters can become perfectly visible at 50 meters, where that same angular error translates into several centimeters. This is why some shooters only “discover” a technical fault when they move up to a longer distance, even though the fault already existed — it was simply masked by the reading scale.
This relationship also works the other way as a deliberate diagnostic tool: intentionally shooting at a longer distance than usual can reveal fine technical faults that weren’t visibly showing up at the shorter distances typically used in regular training.
You should therefore avoid directly comparing the raw size of two groups fired at different distances. The relevant comparison is either at equal distance, or by converting dispersion into angular deviation, which takes a bit more rigor but gives you a real basis for comparison over time.
Building a logbook to track your groups
A single group is a photo. A series of groups tracked over time is a film, and it’s that film that reveals a real trend of progression or regression. Without this tracking, every session remains an isolated data point with no ability to reveal a lasting pattern.
For this tracking to be useful, you need to systematically note a few pieces of context at every session: shooting distance, the weapon and ammunition used, conditions (fatigue, stress, weather for outdoor shooting), and a qualitative observation about the shape of the group — not just its size in centimeters or the score.
Regularly photographing your targets, kept with the date and context, builds a much richer basis for comparison than a simple score number. Two groups with an identical score can have completely different dispersion shapes, and that visual information is lost if you only keep the final score.
A digital shooting logbook really comes into its own here compared to a traditional paper logbook: it lets you centralize target photos, context notes, and history in one place you can review quickly, and it surfaces trends that would be tedious to reconstruct from paper targets scattered in a drawer.
The main value of this long-term tracking is distinguishing normal variation from a real trend. A single bad group after a week of fatigue or stress doesn’t carry the same meaning as a progressive, confirmed deterioration across several consecutive sessions. Only the history lets you make that distinction with confidence.
Analyzing a group during a competition string
Group analysis isn’t limited to training: it also has its place, in a different way, during a competition string. The main constraint is that you generally can’t stop to analyze each impact in detail before the string or stage is finished.
The skill to develop here is a quick, global read rather than a fine-grained analysis. A glance at the overall shape of the group mid-string can be enough to spot an emerging problem — for example a progressive drift starting to appear — without requiring a full, immediate analysis.
Some disciplines let you check impacts between strings or stages, which gives you a limited window to adjust something simple and quick, like foot position or grip firmness, without touching equipment settings during the competition itself. Changing an optic adjustment mid-competition based on a single group remains risky and rarely advisable.
The biggest trap in competition is overreacting to a group that’s slightly worse than usual by markedly changing your technique mid-string. This hasty reaction often introduces more variability than it fixes, because it breaks the consistency of movement that remains the foundation of precision.
Detailed analysis and real corrective work belong after the competition, with a clear head, comparing the day’s groups against the history in your logbook. It’s this after-the-fact analysis, without the pressure of live fire, that lets you identify the real areas to work on for upcoming sessions.
Classic traps in group analysis
The first trap is over-interpreting a very small number of shots. A group of three or four impacts can seem to tell a clear story when it’s really just normal statistical variation. A minimum base of five to ten shots gives a noticeably more reliable reading than a handful of isolated impacts.
The second trap is looking for a single cause when several factors can combine and sometimes partially cancel each other out. A breathing fault can partially mask a trigger fault, or vice versa, which complicates the diagnosis if you’re trying to isolate a single variable at a time without a rigorous method.
The third trap is completely ignoring the equipment hypothesis out of excessive confidence in your own technique. An experienced shooter sometimes tends to look only for form-related causes, when in reality a mounting, wear, or ammunition problem actually explains the observed dispersion.
The fourth trap is comparing between different shooters or different weapons without accounting for context. The size of a “normal” group varies enormously depending on the weapon, caliber, distance, and the shooter’s level; comparing your own group to that of an experienced club shooter on a different weapon provides no useful information.
The fifth trap is correcting several elements at once after a bad group — position, grip, and breathing all at the same time — which makes it impossible afterward to know what actually solved the problem. One adjustment at a time, tested across several consecutive groups, remains the most reliable method for learning durably from your mistakes.
Measuring objectively and knowing when to suspect the equipment
Looking at a group with the naked eye gives a useful first impression, but that impression stays subjective and varies depending on visual fatigue or the desire to feel reassured after a difficult session. A few simple tools let you make that reading more objective, and therefore more comparable from one session to the next.
The most basic measurement is to note the maximum distance between the two farthest-apart impacts in the group, often called the extreme spread. It’s a simple measurement to take with a ruler, giving a numerical value that’s easy to compare over time, provided you always measure over the same number of shots.
A slightly finer measurement is to locate the center of the group — usually by crossing the horizontal and vertical extremes — and then look at the average distance of each impact from that center. This measurement gives an idea of overall dispersion independent of a single extreme point that could skew the reading.
A transparent graduated template, laid directly on the target, lets you measure these gaps quickly without complicated gear. Some club shooters also use a simple photo app with a known reference scale on the target, which lets you measure after the fact from a photo rather than on the spot in the cold or the rush of a session.
You should never lose sight of the fact that these measurements don’t replace the shape reading discussed earlier in this article. An identical extreme spread can correspond to a round, well-centered group or to a widely scattered star-shaped one; the numerical measurement and the visual shape reading are complementary, not interchangeable.
Consistency of measurement method matters more than its sophistication. Measuring sometimes with a ruler, sometimes by eye, sometimes with a different app introduces artificial variability that has nothing to do with your real technical progress. Pick a simple method and keep it the same over time.
Once this objective measurement is in place, it becomes the tool that lets you spot the precise moment when dispersion stops being explained by technique. After seriously working on your technique and confirming, with numbers to back it up, that dispersion stays the same despite the effort, it becomes legitimate to steer the analysis toward the equipment. This step needs to stay methodical, otherwise it leads to swapping parts at random without ever isolating the real cause.
The optic’s mounting point is often the first suspect in cases of erratic dispersion with no recognizable shape. A slightly loosened mounting ring, or screws that haven’t been retightened after several shooting sessions, can introduce play that’s invisible to the eye but perfectly capable of producing wide dispersion with no apparent logic.
The condition of the barrel also plays a non-negligible role, especially on heavily used weapons. Significant fouling or advanced wear can progressively degrade group consistency, which sometimes explains dispersion that slowly worsens over several months with no perceptible change in the shooter’s technique.
The ammunition itself introduces variability that shouldn’t be underestimated, especially with handloaded or entry-level cartridges whose consistency can vary from batch to batch. A simple test is to compare several groups fired with the same batch of ammunition under conditions as stable as possible, before concluding there’s a real consistency problem.
The most reliable method for isolating an equipment cause remains shooting from a fixed rest, when that’s possible and allowed on the range. By eliminating human variability as much as possible, a group fired from a stable rest directly reveals the intrinsic precision of the weapon-ammunition pairing, which lets you know whether the dispersion observed in normal position really comes from the shooter or partly from the equipment.
You should nonetheless stay cautious with this method: a poorly set-up rest or a poorly wedged weapon can itself introduce artificial variability. The goal is to reduce human variability, not to eliminate it entirely under conditions that no longer resemble real shooting at all.
Adapting the analysis to the discipline you practice
Reading a group doesn’t apply in exactly the same way across every discipline, even though the general principles of vertical and horizontal dispersion hold true everywhere. Time, distance, and position constraints change what’s realistic to observe and correct.
In 10-meter rifle, the generally very stable position and the fairly unconstrained shot timing allow for fine, immediate analysis between each shot. This is the most favorable context for learning to read your groups, because each variable stays relatively isolated and observable calmly.
In 25-meter pistol, the lower natural stability of the standing, arm-extended position slightly amplifies every source of dispersion, which makes the reading noisier at times but also more revealing of the fine trigger and grip faults discussed earlier. The same finger-on-trigger fault is often easier to spot in pistol than in rifle.
In longer-range precision shooting, group analysis becomes more complicated by the addition of external factors like wind or light variations, which can mimic or mask a real technical fault. An experienced club shooter learns to mentally separate what belongs to outside conditions from what belongs to their own consistency of movement.
In dynamic shooting on cardboard or steel targets, group analysis mostly happens on zones where several impacts overlap on the same target after a repeated drill, rather than on a classic slow-fire group. Execution speed adds an extra variable that makes the reading less directly transferable to the vertical and horizontal dispersion principles seen earlier, but it still stays informative about the overall consistency of the movement.
Whatever the discipline, the principle stays the same: identify the shape of the dispersion, link it to a probable cause, test a targeted correction, then verify over the following sessions. Only the timescale and the fineness of observation change from one discipline to another.
Setting up an analysis routine after every session
An effective analysis routine doesn’t need to be long or complex to be useful; above all it needs to be systematic and repeated after every session, rather than reserved for days when the group looks particularly bad.
Start by observing the overall shape of the group before looking at the score. Is the dispersion more vertical, horizontal, star-shaped, or on the contrary well tightened? This first visual impression immediately steers the rest of the analysis and stops you from focusing solely on the final number.
Next, relate that observation to the context of the session: fatigue level, emotional state, equipment conditions, number of shots already fired before that group. Many dispersions are simply explained by end-of-session fatigue rather than a real, stable technical fault.
Then note down a single probable-cause hypothesis, not a list of five possible causes. This discipline forces you to prioritize and to test one concrete thing at the next session, rather than scattering your own focus across several correction leads at once.
Finally, systematically plan a check at the next session: is the suspected fault found again under the same conditions? This verification loop is what turns a simple, one-off observation into real, reliable knowledge about your own technique, session after session.
This routine, repeated over several months, eventually builds a real technical intuition that goes well beyond the conscious, methodical analysis described in this article. An experienced club shooter who’s been practicing this kind of observation for years often spots the probable cause of a dispersion almost instinctively, with one glance at the target, simply because they’ve accumulated hundreds of associations between group shape and the real cause verified afterward.
This intuition never fully replaces the rigorous method, especially when facing a new or unusual problem that doesn’t match any pattern already encountered. But it considerably speeds up diagnosis on common faults, which frees up training time to work on the correction itself rather than spending a long time hunting for its cause. That is, at bottom, the ultimate goal of this entire diagnostic approach: turning a target that once seemed unreadable into a clear, immediately usable source of information.
FAQ
Q: How many shots do you need for a group to be truly analyzable? A: A minimum base of five to ten shots gives a noticeably more reliable reading than a group of two or three impacts, which mostly reflects normal statistical variation. The longer the string, the more representative the observed dispersion shape becomes of a real technical trend.
Q: My group is good in training but degrades in competition, why? A: This is generally a sign of stress or pressure management rather than a real underlying technical problem, especially if the competition dispersion takes a different shape than what’s observed in training. Working on breathing and movement consistency under pressure, not just pure technique, helps reduce this gap.
Q: Should I switch ammunition if my group stays scattered despite solid technical work? A: It’s worth testing once form-related causes have been reasonably ruled out, since a load’s consistency varies by batch and manufacturer. Compare several groups with the same ammunition before concluding anything, since a single scattered group isn’t enough to blame the ammo.
Q: Does a shifted group mean I need to adjust my optic? A: Only if that offset is confirmed across several consecutive groups and stays tight, which indicates consistent technique but an aim point that needs adjusting. An isolated offset on a single group can be a one-off anomaly and doesn’t justify an immediate adjustment.
Q: Does group analysis also apply to dynamic shooting like IPSC? A: The principle stays valid in phases where you can observe several impacts grouped on the same cardboard or steel target, but the analysis there is more complex because execution speed adds extra factors. It stays especially useful on the static precision drills built into dynamic training.
Q: Is a digital shooting logbook really necessary for this kind of analysis? A: It’s not strictly mandatory, but it makes long-term tracking far easier by centralizing target photos, session context, and history in one place you can review. Without this structured tracking, it’s hard to distinguish a real technical trend from a simple one-off variation from one session to the next.